MeeraCRM – वास्तविक UI से HOD & सभी रोल्स गाइड
यह गाइड https://crm.n.migti.com/ पर चल रहे MeeraCRM से Playwright द्वारा लिए गए real screenshots पर आधारित है — mock images नहीं।
| Role | Password | Login में Role select | |
|---|---|---|---|
| HOD | test@gmail.com | 123456 | Head Of Department |
| Sales | sales@gmail.com | 123123 | Sales Manager |
| Back Office | be@gmail.com | 123123 | Back Office Exicutive |
| Procurement | pro@gmail.com | 123123 | Procurement |
Login कैसे करें (सभी roles)
- Browser:
https://crm.n.migti.com/#/login - Email और Password भरें (ऊपर table देखें)
- Role dropdown (password के नीचे, दाईं तरफ) — सही role चुनें
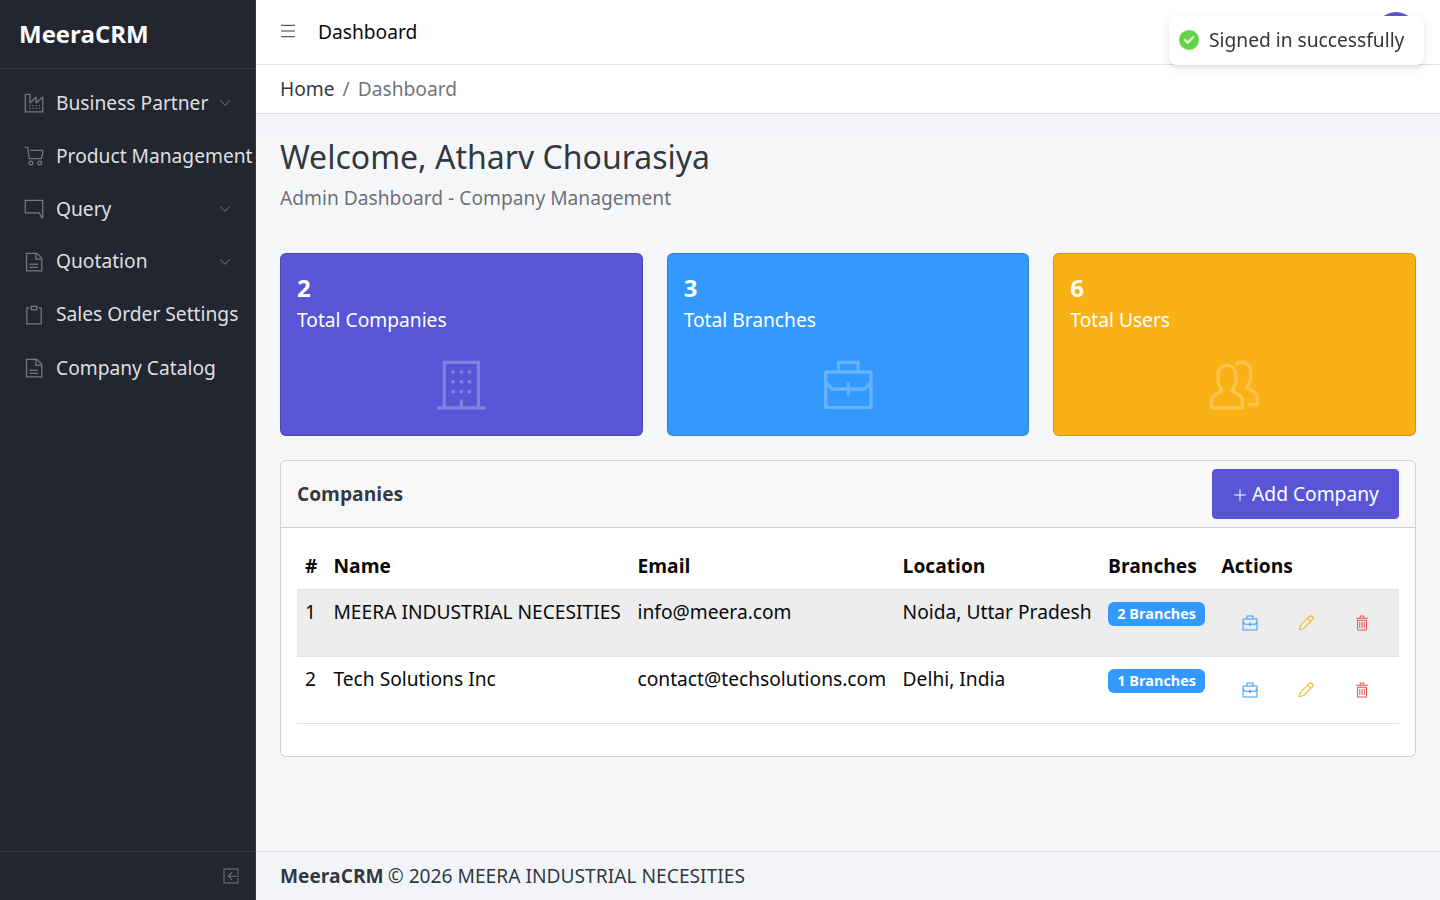
- Sign In — success toast: "Signed in successfully"
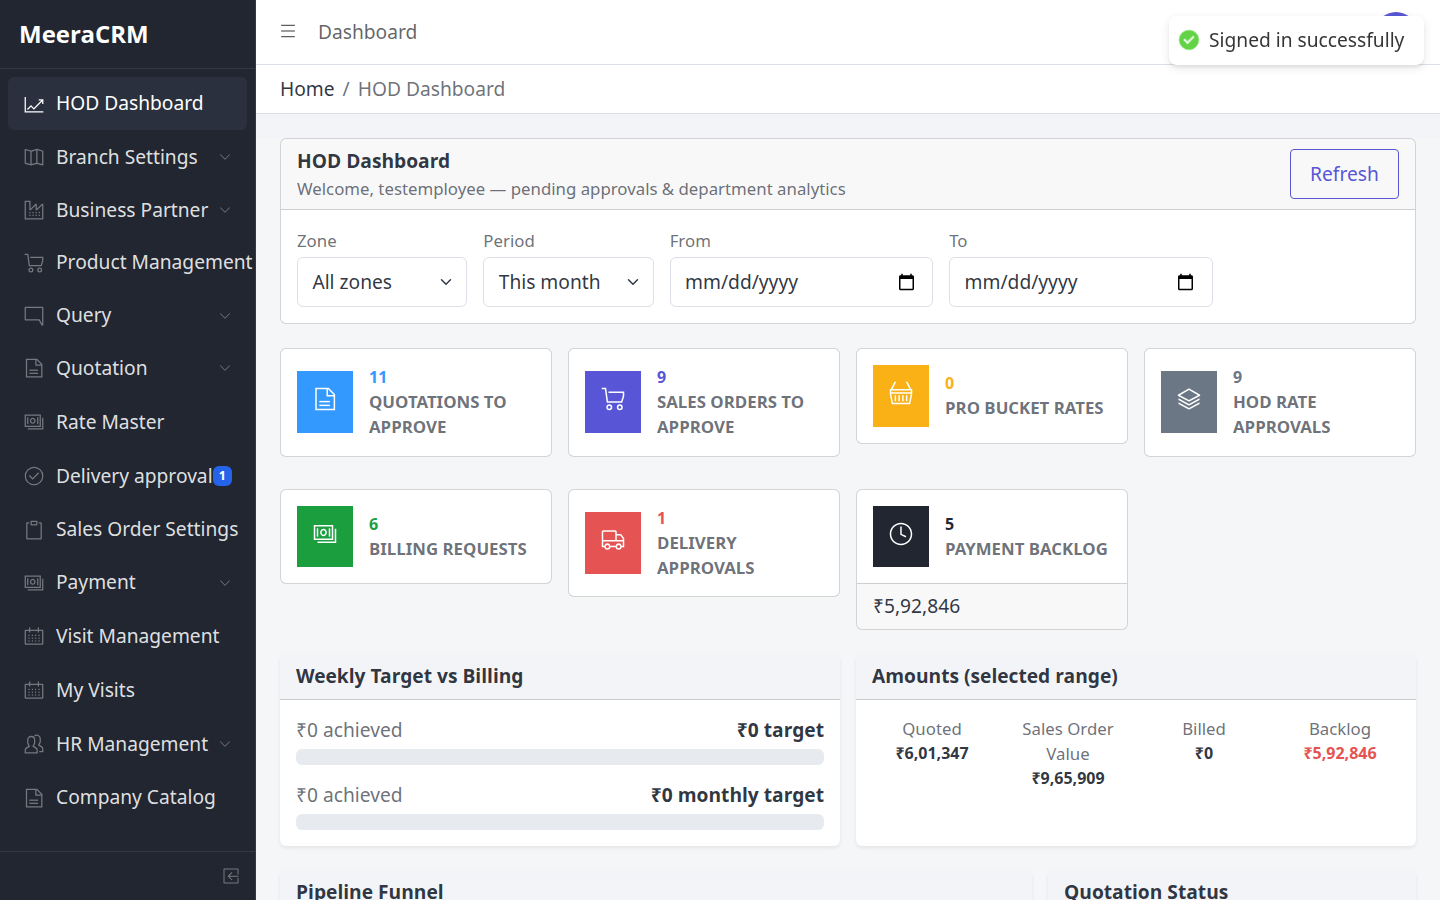
- HOD →
/hod-dashboard, Procurement →/pro-dashboard, Sales/BO →/dashboard
✅ Validation Rules Login.js + employee.validator.js
| Valid email format required — empty या invalid format पर error | |
| Password | Required — backend employee record के encrypted password से match |
| Role | Dropdown से selectable role required — DB में employee का role field exact match होना चाहिए |
⚠️ ध्यान रखें
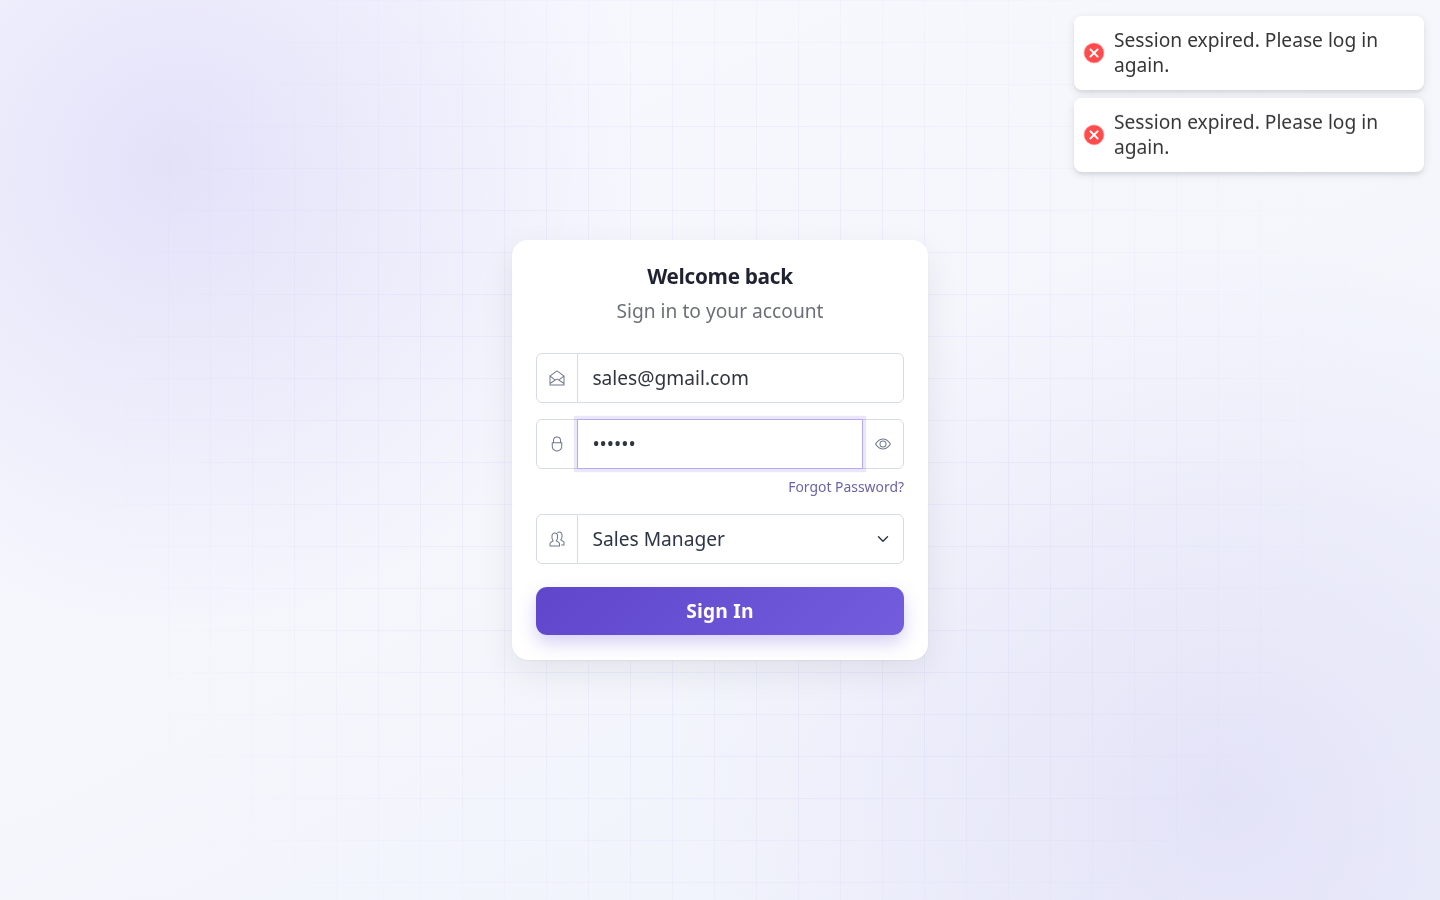
- Role गलत select करने पर system "Email not found" दिखाता है (security — wrong role hint नहीं देता)
- Password गलत हो तो "Incorrect password. Please try again."
- Login form में Super Admin, Admin, Administrator, Purchase Executive, Sales Executive roles hidden हैं
- Employee password minimum 6 characters (create time — employee.validator.js)
② रोल्स और जिम्मेदारियाँ
(यह section पहले जैसा सही है — sidebar modules के साथ)
| Role | हिंदी | मुख्य कार्य | Sidebar |
|---|---|---|---|
| Head Of Department | विभाग प्रमुख | Employee setup, 3-level approval, delivery approve | HOD Dashboard, Employees, Pro Bucket, Quotations, PO Bucket, Delivery approval |
| Sales Manager | सेल्स | Query, Quotation, client follow-up, PO convert | Query, Quotation, Quotation Follow-up |
| Back Office Exicutive | बैक ऑफिस | Query data entry, codify support | Query, Query Products |
| Procurement | प्रोक्योरमेंट | Pro Bucket rates, Purchase Bucket buying | Pro Dashboard, Pro Bucket, Purchase Bucket, Suppliers |
| Finance / Inventory / Dispatch | फाइनेंस / स्टॉक / डिस्पैच | Payment, stock, dispatch proof | Billing, Inventory Bucket, Dispatchment |
③ लॉगिन – Role-wise (Real Screenshots)
Login page: Welcome back → Email → Password → Select Role → Sign In
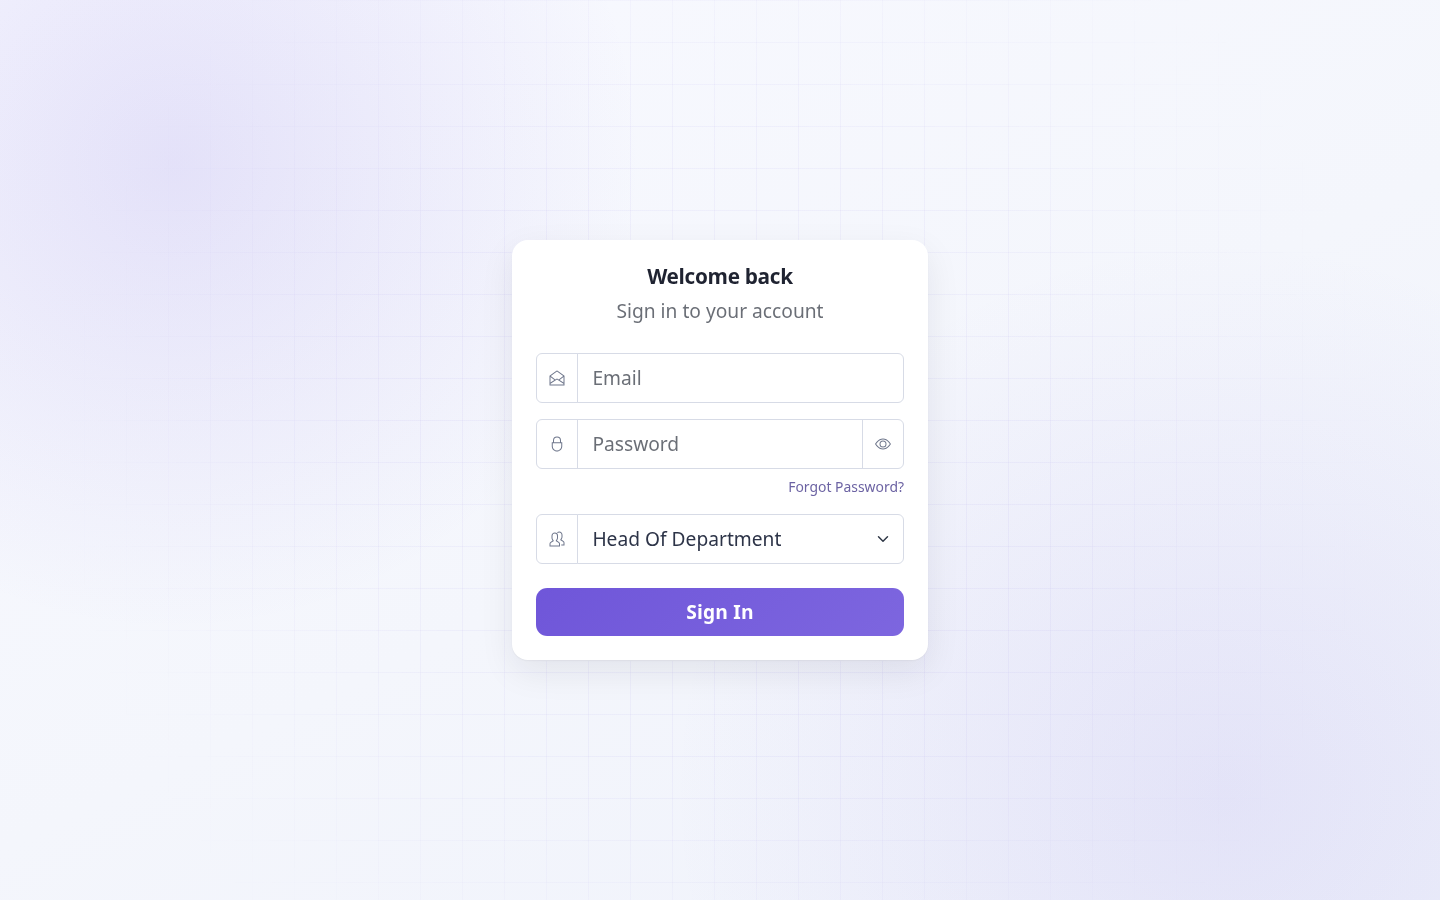

🎯 क्या करें
- Email field में registered email type करें
- Password enter करें — show/hide eye icon से verify कर सकते हैं
- Select Role dropdown से अपना exact role चुनें
- Sign In click — dashboard auto-open (role-based redirect)
⚠️ ध्यान रखें
- Har role ka alag screenshot upar hai — training mein team ko apna role dikhayein
- Forgot Password → Administrator ko request message bhejta hai; auto-reset nahi hota
④ HOD – End-to-End प्रवाह
test@gmail.com / 123456 Login → HOD Dashboard
HOD के 3 Approval Points
- Pro Bucket – procurement rates approve
- Quotation – HOD Approved (margin check)
- PO Bucket – PO HOD Approved → Purchase Bucket
- Delivery approval – dispatch proof verify (sidebar badge दिखता है)
🎯 HOD Dashboard पर क्या देखें
- Pending approvals count — Pro rates, Quotations, PO, Delivery
- Target / analytics widgets — branch performance monitor
- Sidebar badges: Delivery approval, Pro Bucket pending numbers
⚠️ ध्यान रखें
- HOD ko full access milta hai — lekin approval skip mat karein; PO tabhi Purchase Bucket mein jata hai jab HOD PO approve kare
- Quotation
hod_approvedke bina PO convert nahi hota (purchaseOrder.service.js) - Pro rate approve ke bina quotation mein valid procurement cost nahi aata
⑤ HOD – Employee Creation
Sidebar: Branch Settings → Employees
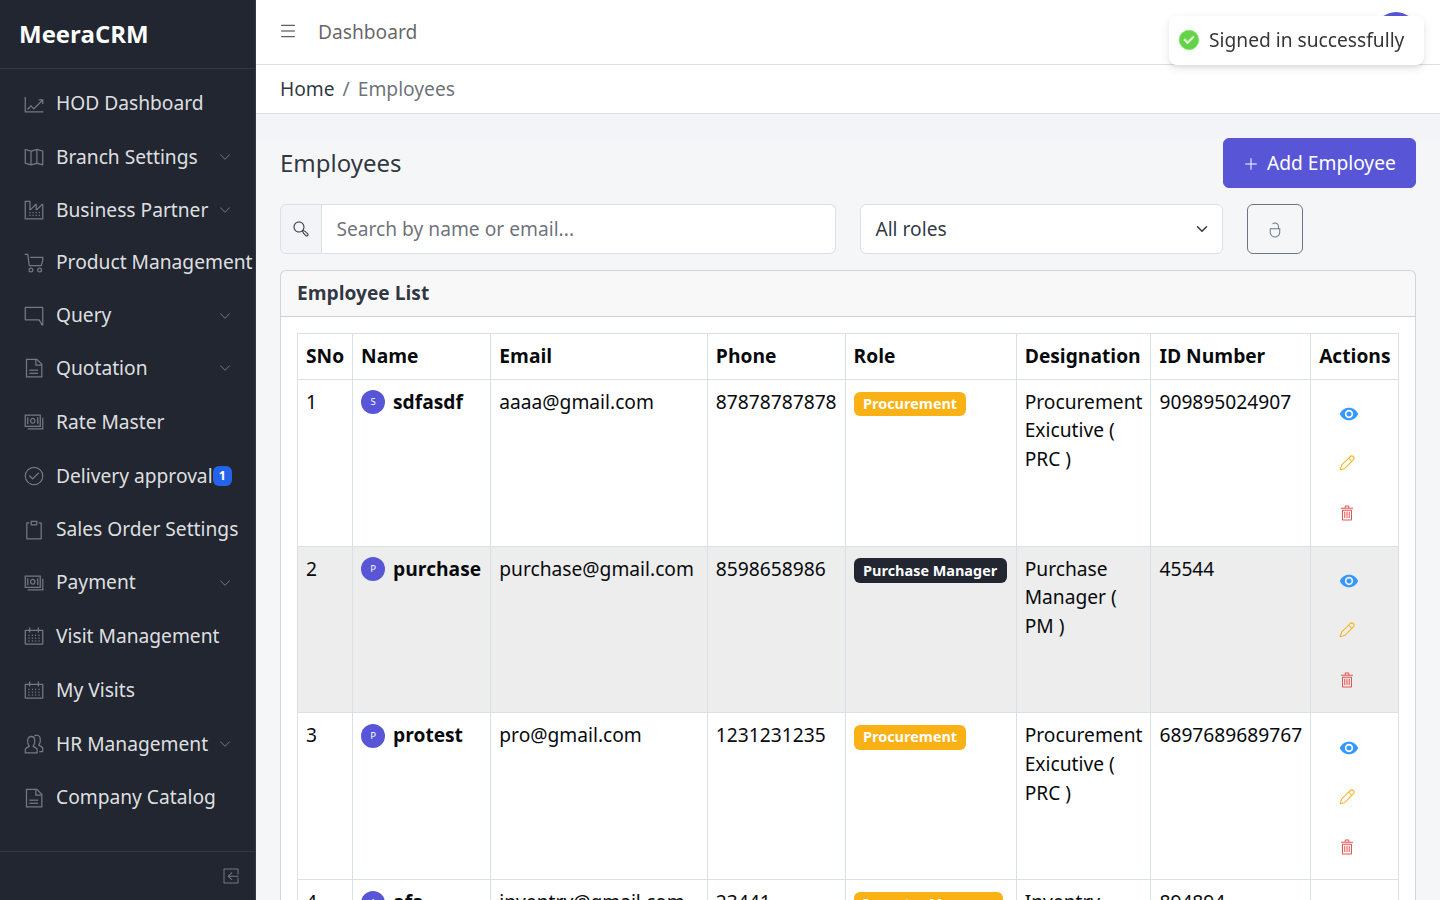
Employee Steps
- Branch Settings → Employees
- Add Employee – name, email, role (Sales/Procurement/BO…), password
- Permissions section में module access set करें
- Zones / Sub-zones भी Branch Settings में configure करें
✅ Employee Validation employee.validator.js
| Name * | 2–100 characters |
|---|---|
| Email * | Valid email, unique |
| Phone * | 5–20 digits only |
| Role * | Required (sales_manager, procurement, head_of_department…) |
| Designation * | 2–100 characters |
| Address * | 2–500 characters |
| ID number * | 2–50 characters |
| Password * | Minimum 6 characters |
| Zone IDs | Valid Mongo ObjectId (24 hex) — zone access ke liye |
⚠️ ध्यान रखें
- Employee create karte waqt sahi branchId aur permissions set karein
- Zone/SubZone galat set karne par sales person ko galat client list dikhegi
- Employee create ke baad login credentials team ko securely share karein
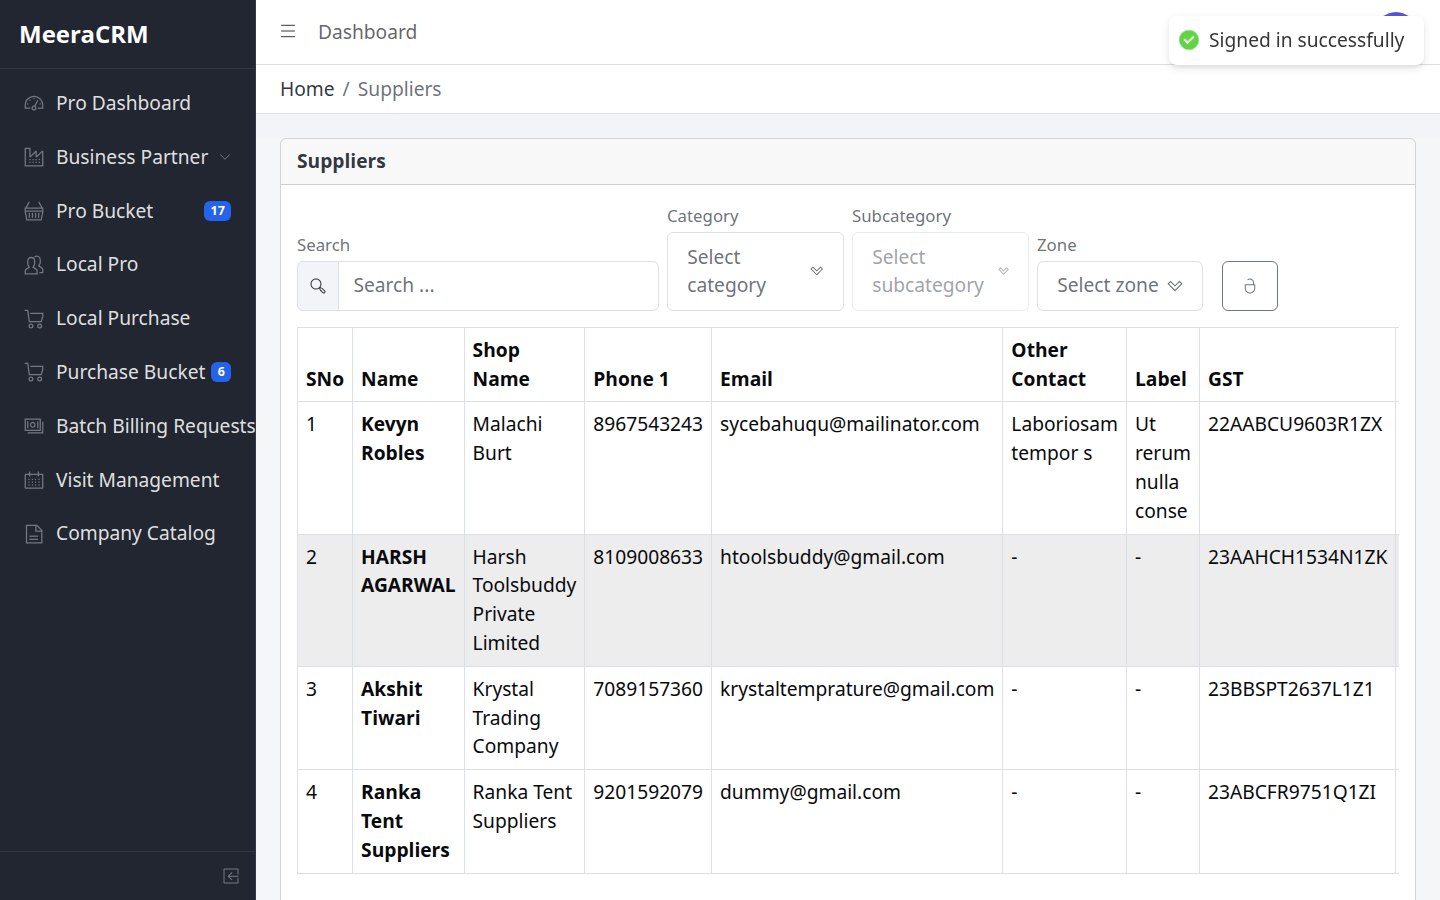
⑥ सप्लायर क्रिएशन
Sidebar: Business Partner → Suppliers (HOD & Procurement दोनों)
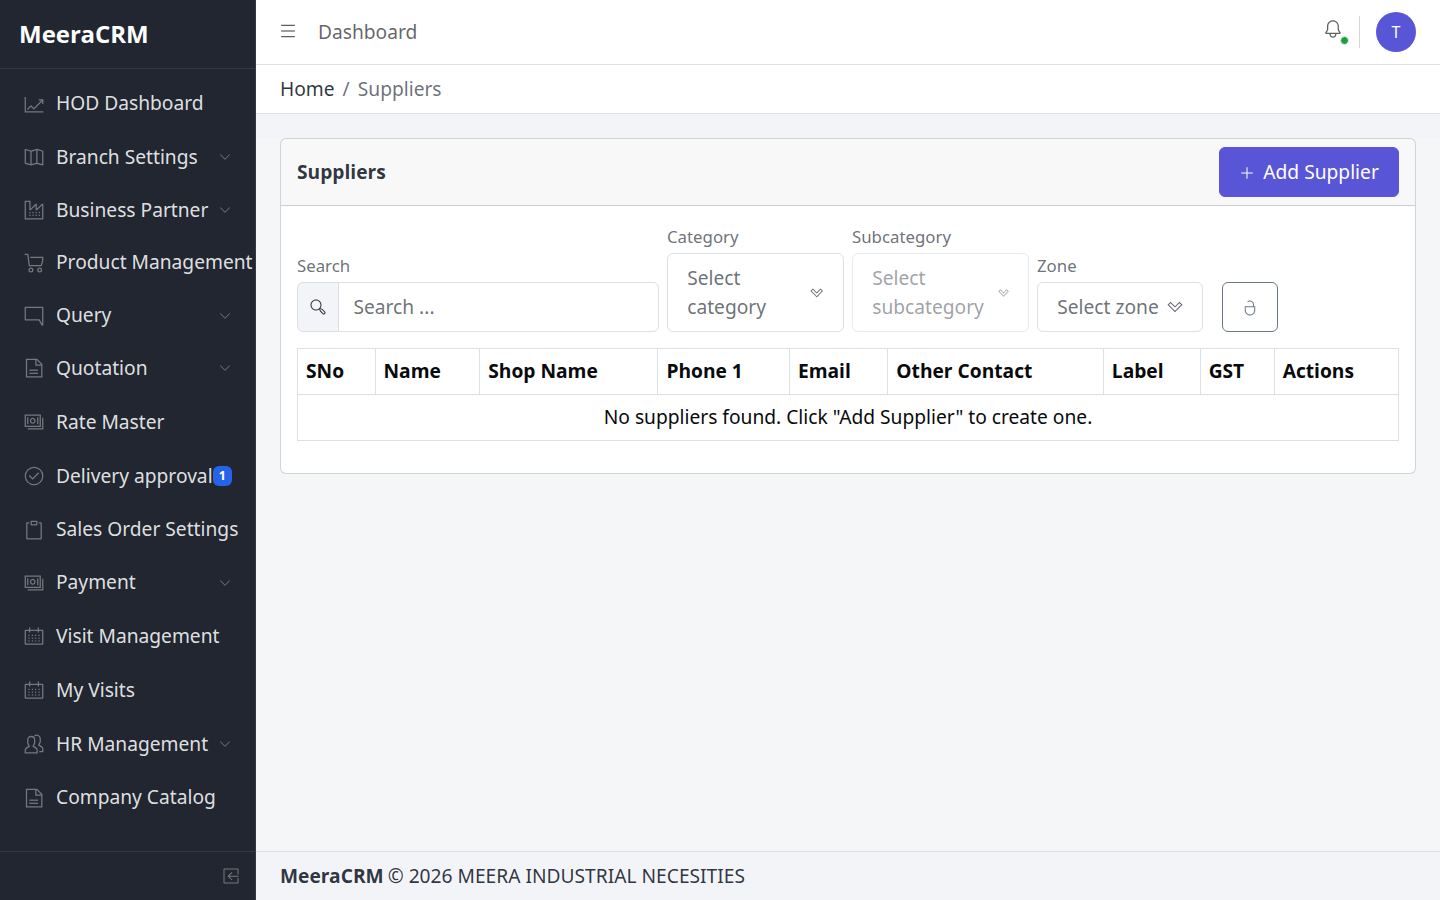
Steps
- Business Partner → Suppliers
- Add / Create Supplier
- Name, GSTIN (15 char), Phone, Category, Bank (Account, IFSC, UPI)
- Save – अब Pro Bucket में supplier select होगा
✅ Supplier Validation SupplierForm.js + supplier.validator.js
| Name * | 2–100 characters |
|---|---|
| Address * | Required, max 500 chars (frontend form) |
| Phone 1 & 2 * | 10–15 digits each (frontend); spaces auto-remove |
| Email * | Valid email format |
| GST * | 15-char GSTIN uppercase: 09AABCU9603R1ZX |
| Categories | Optional — product category mapping |
| Bank details | Toggle Include bank details ON karne par sab required: Account 9–18 digits, IFSC format SBIN0001234, UPI required |
⚠️ ध्यान रखें
- Payment request ke liye bank details zaroori — bina bank ke Purchase Bucket payment raise fail ho sakta hai
- GSTIN galat format par form submit nahi hoga — pehle validate karein
- Supplier create karne se pehle Pro Bucket mein rate submit impossible — pehle supplier, phir rates
- Form draft auto-save hota hai (
supplier_form_draft) — accidental close se data bach sakta hai
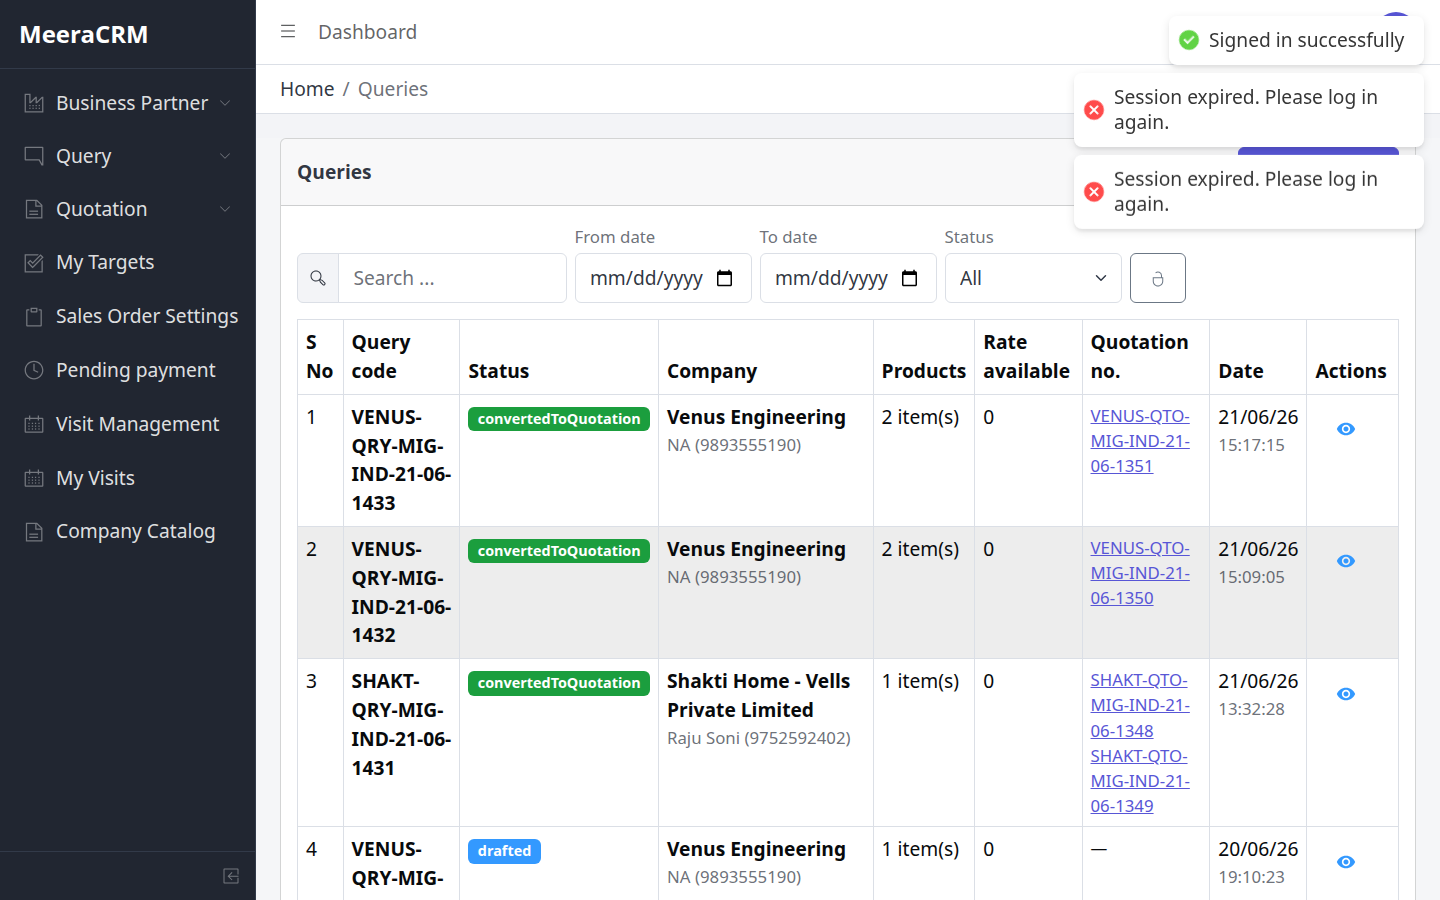
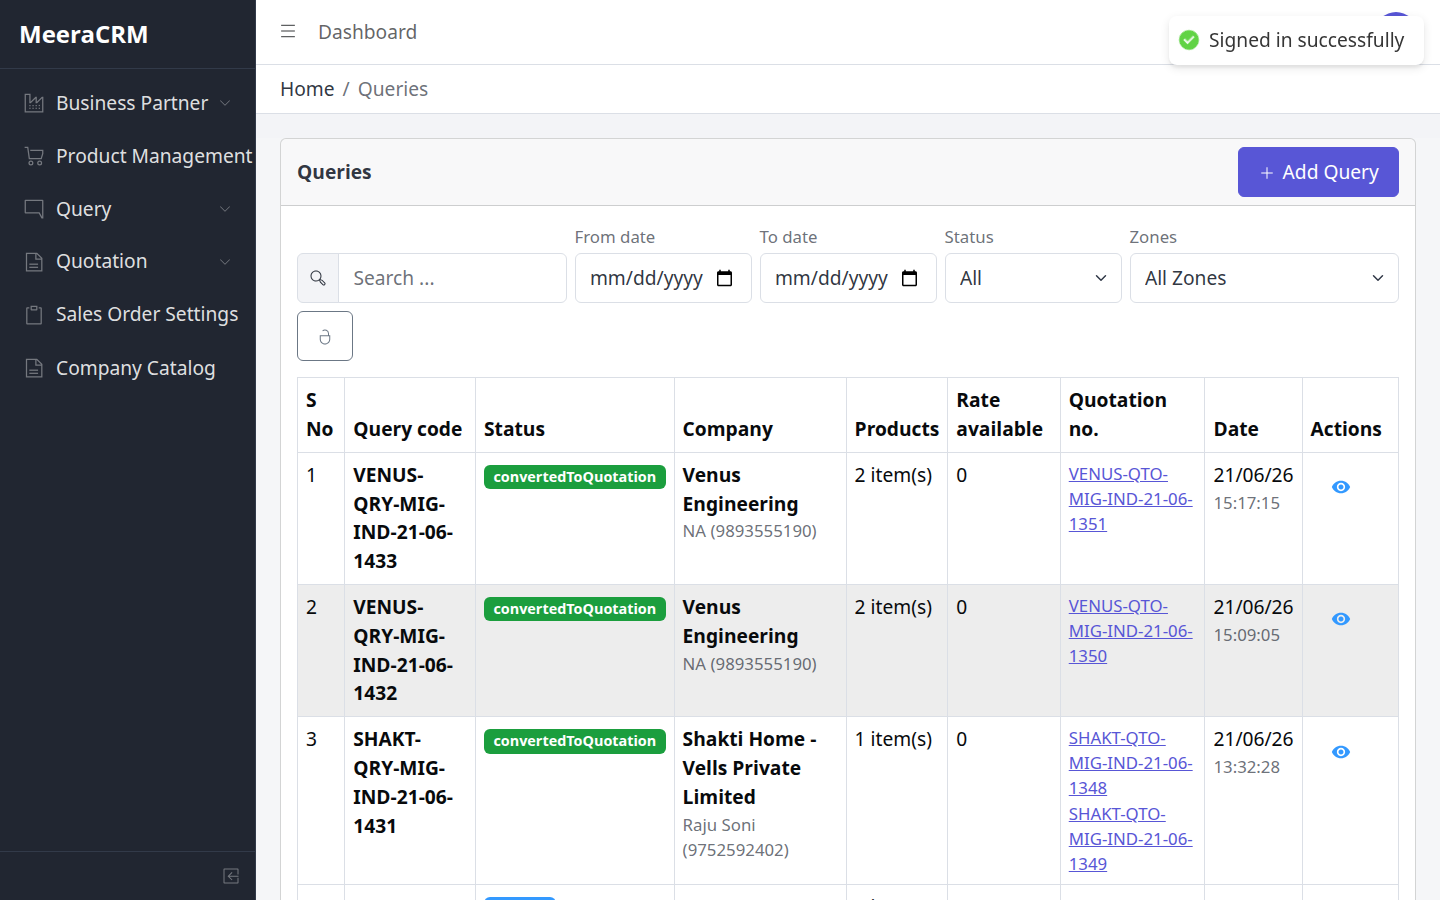
⑦ क्वेरी बनाना & Codification
HOD / Sales / Back Office – Sidebar: Query → Queries
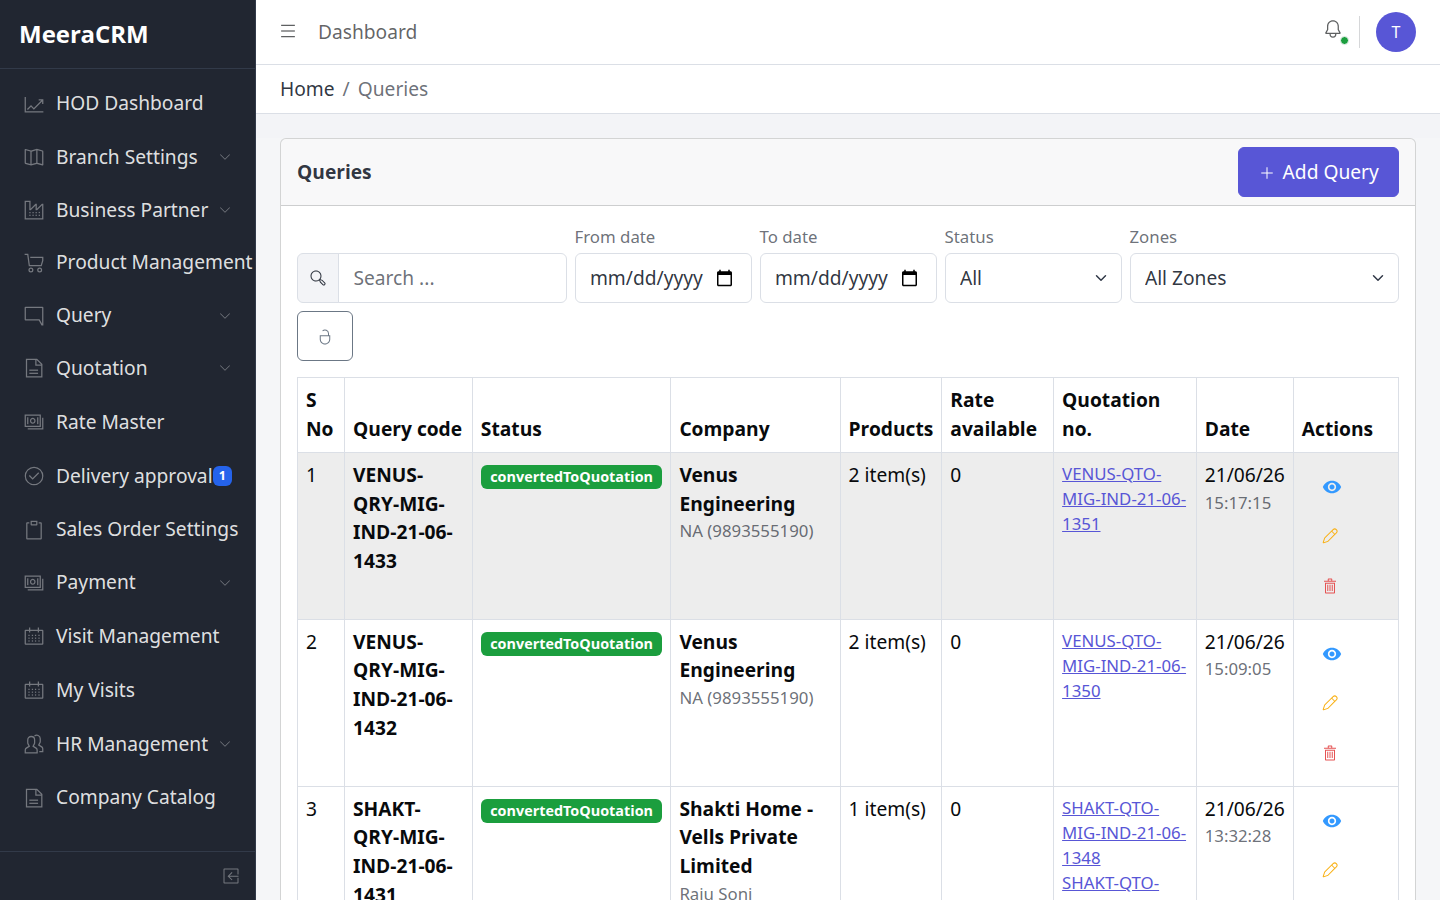

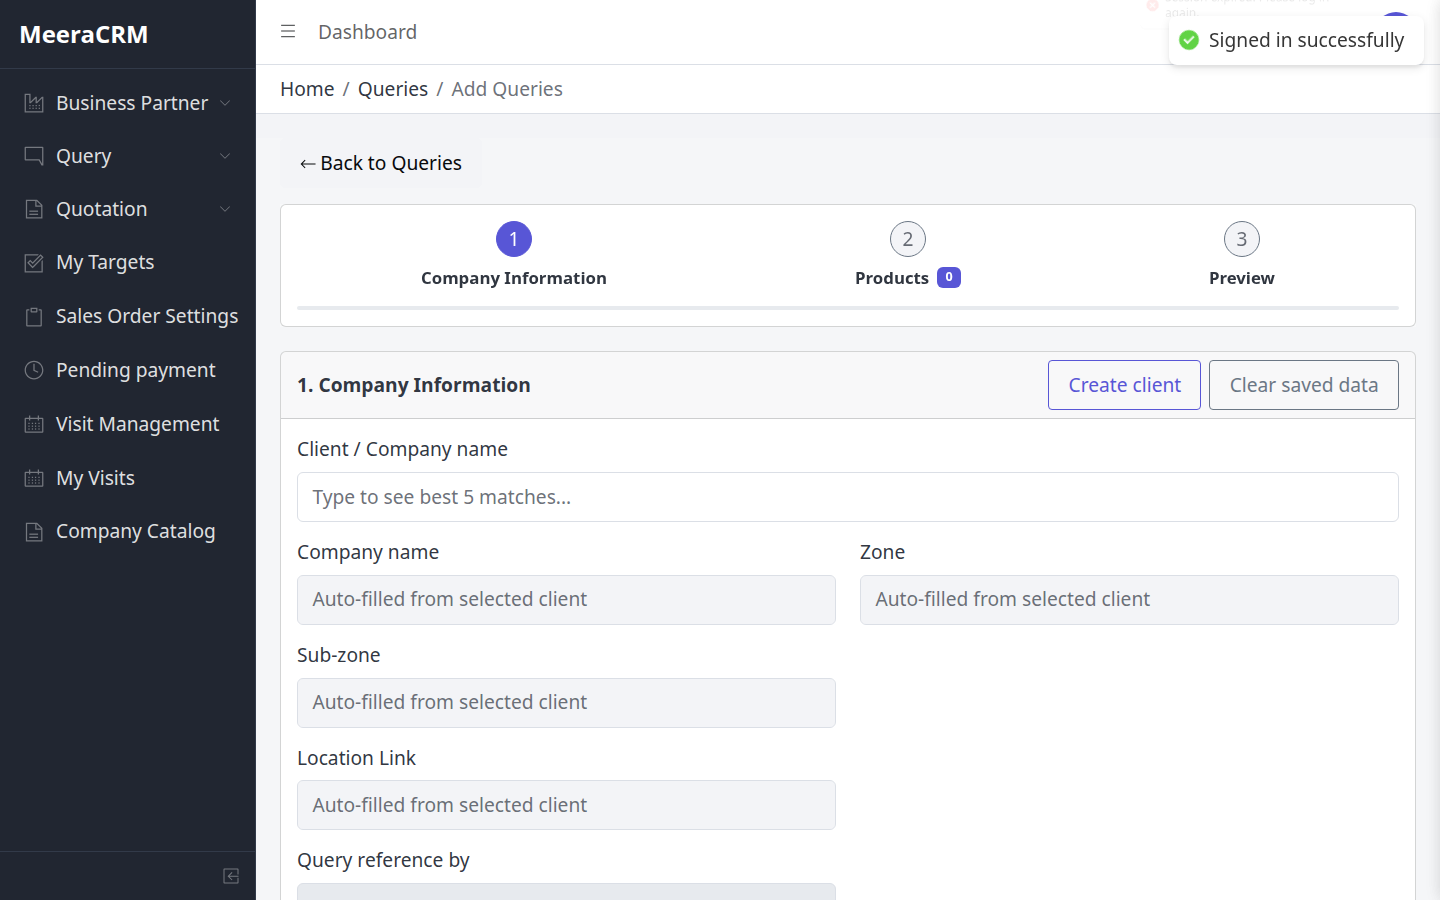
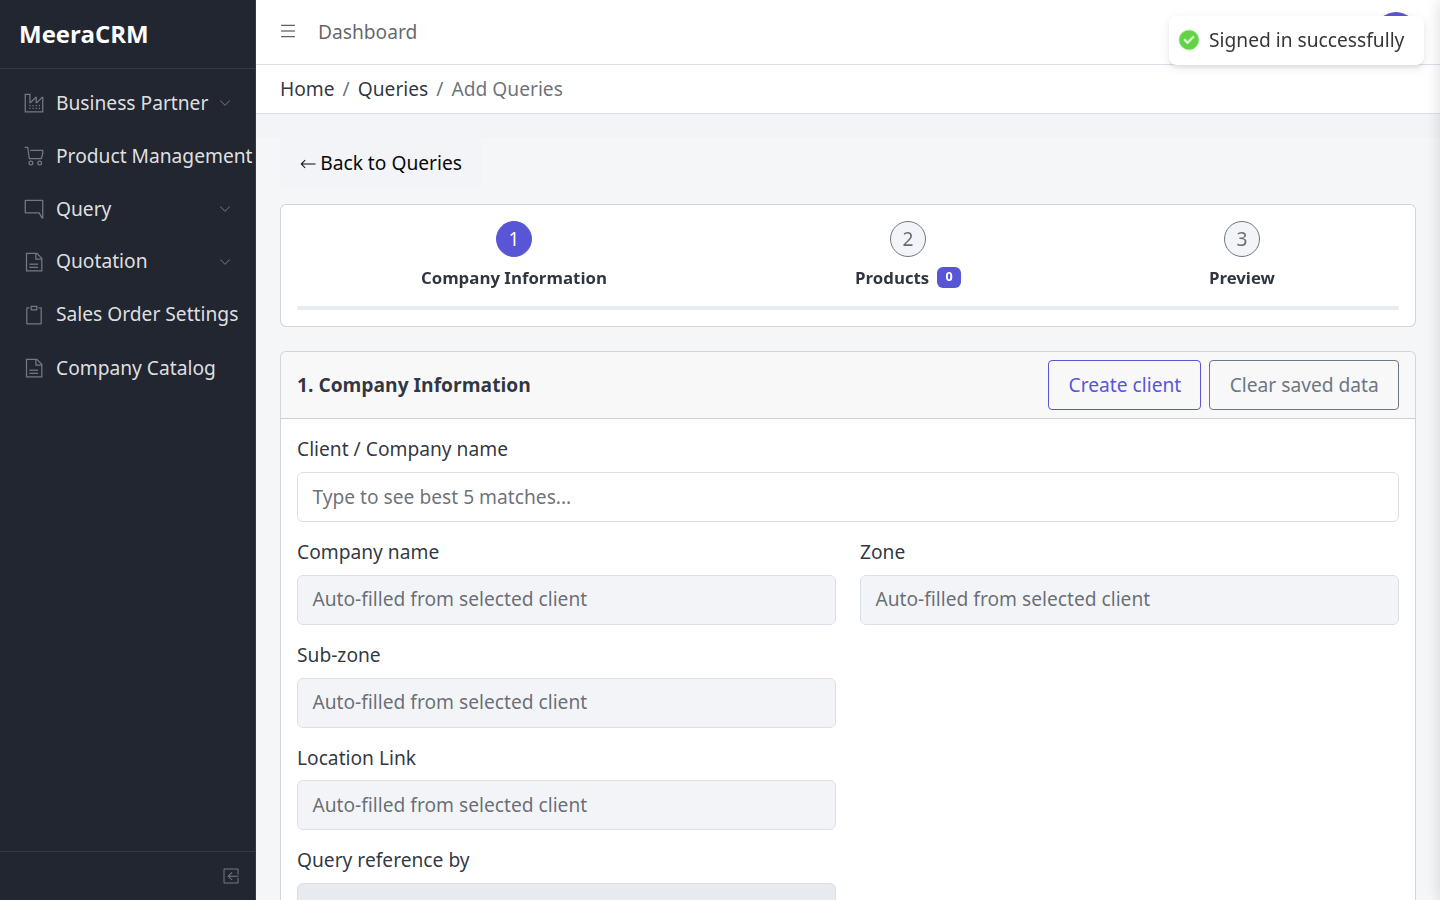
Query Create – Step by Step (Actual UI)
- Query → Queries → Add (या
/queries/new) - Step 1 – Company Information: "Client / Company name" में type करें → best 5 matches; नया client → Create client button
- Zone, Sub-zone, Location auto-fill; Query reference by set करें
- Step 2 – Products: catalog search या new product → Codify (Product Code mig#### + tracking code auto)
- Step 3 – Preview → Save — lines automatically Pro Bucket में जाती हैं
🎯 Step 1 – Company Information (Actions)
- Client / Company name search box mein type karein — top 5 matches dikhenge
- Match select karein → Zone, Sub-zone, Location auto-fill
- Naya client ho to Create client button
- Purchase Manager select karein (kam se kam 1)
- Query reference by set karein → Next
🎯 Step 2 – Products & Codification (Actions)
- Catalog se product search ya manually name enter
- Naya product: Group + Category select → Codify → auto
mig####+ tracking code - Add to query se line table mein add karein
- Kam se kam 1 product line required → Next
✅ Query Validation QueryForm.js + query.validator.js
| Company name * | Required, max 100 characters |
|---|---|
| Purchase manager * | At least 1 select; name max 100 chars; phone exactly 10 digits if filled |
| Billing / Shipping | Max 500 characters each |
| Query reference by * | Required — direct / HOD / sales person |
| Products * | At least 1 product line with productName |
| Product name * | Required per line (backend) |
| Quantity * | Whole number, 0 to 1,00,000 |
| Group & Category * | New query mein har line par required (edit mein optional) |
| GST % | 0–100 if provided |
| Product images | Max 3 images per product line |
| New product codify | Group + Category required; system auto-generates productCode + ritems tracking |
⚠️ ध्यान रखें
- Query save hote hi har product line Pro Bucket mein
pendingstatus ke saath jati hai - Draft query sirf HOD edit kar sakta hai — convert hone ke baad non-HOD edit block
- Form draft localStorage mein save hota hai — Clear saved data se reset
- Codify ke bina naye product par Pro Bucket mein rate link mushkil
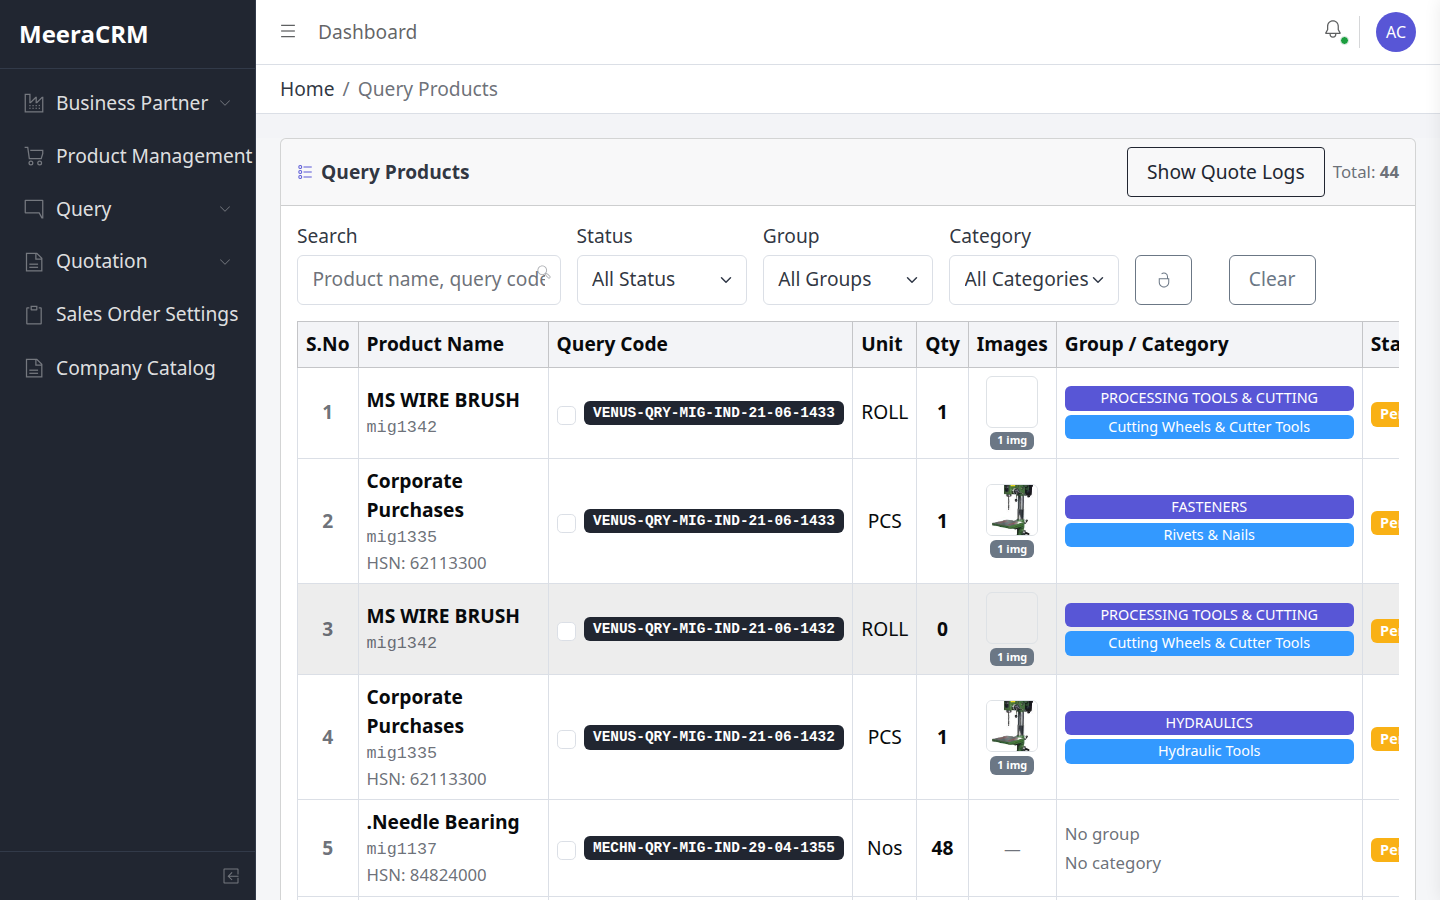
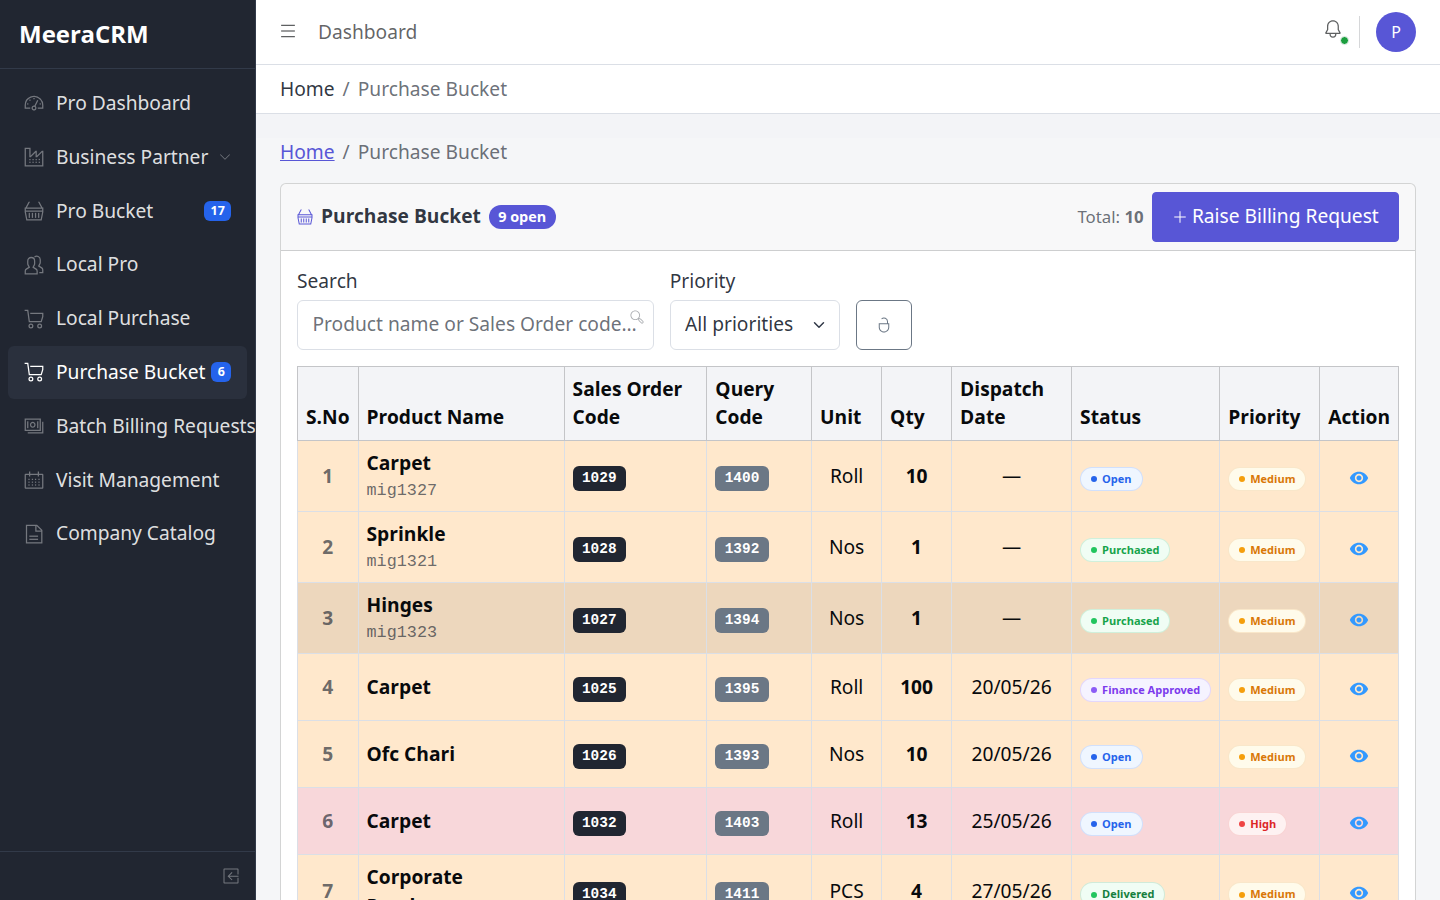
⑧ Query Production – Pro Bucket
Procurement submit + HOD approve
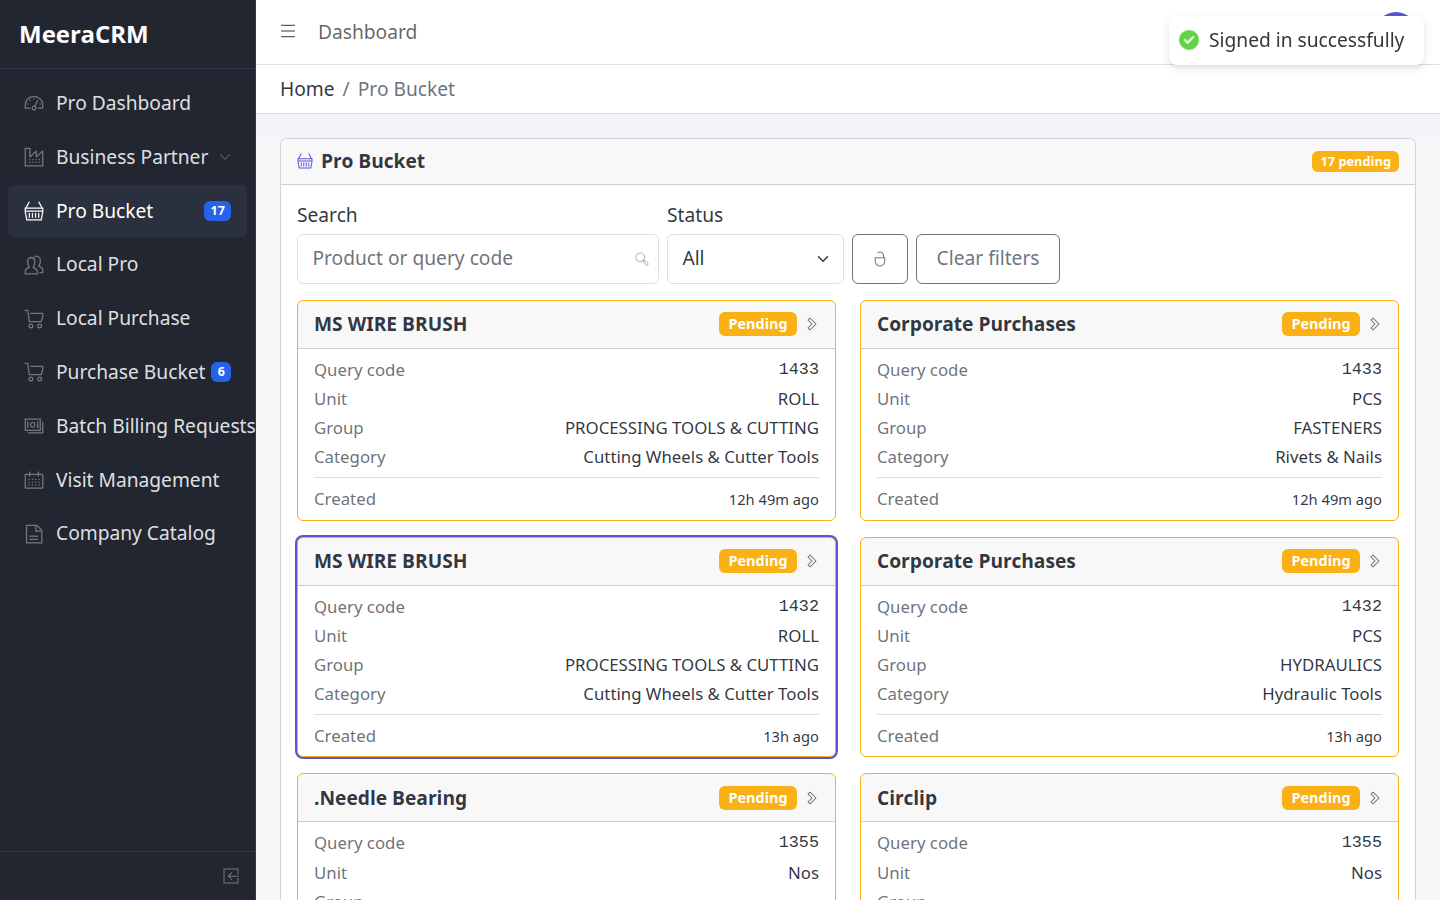
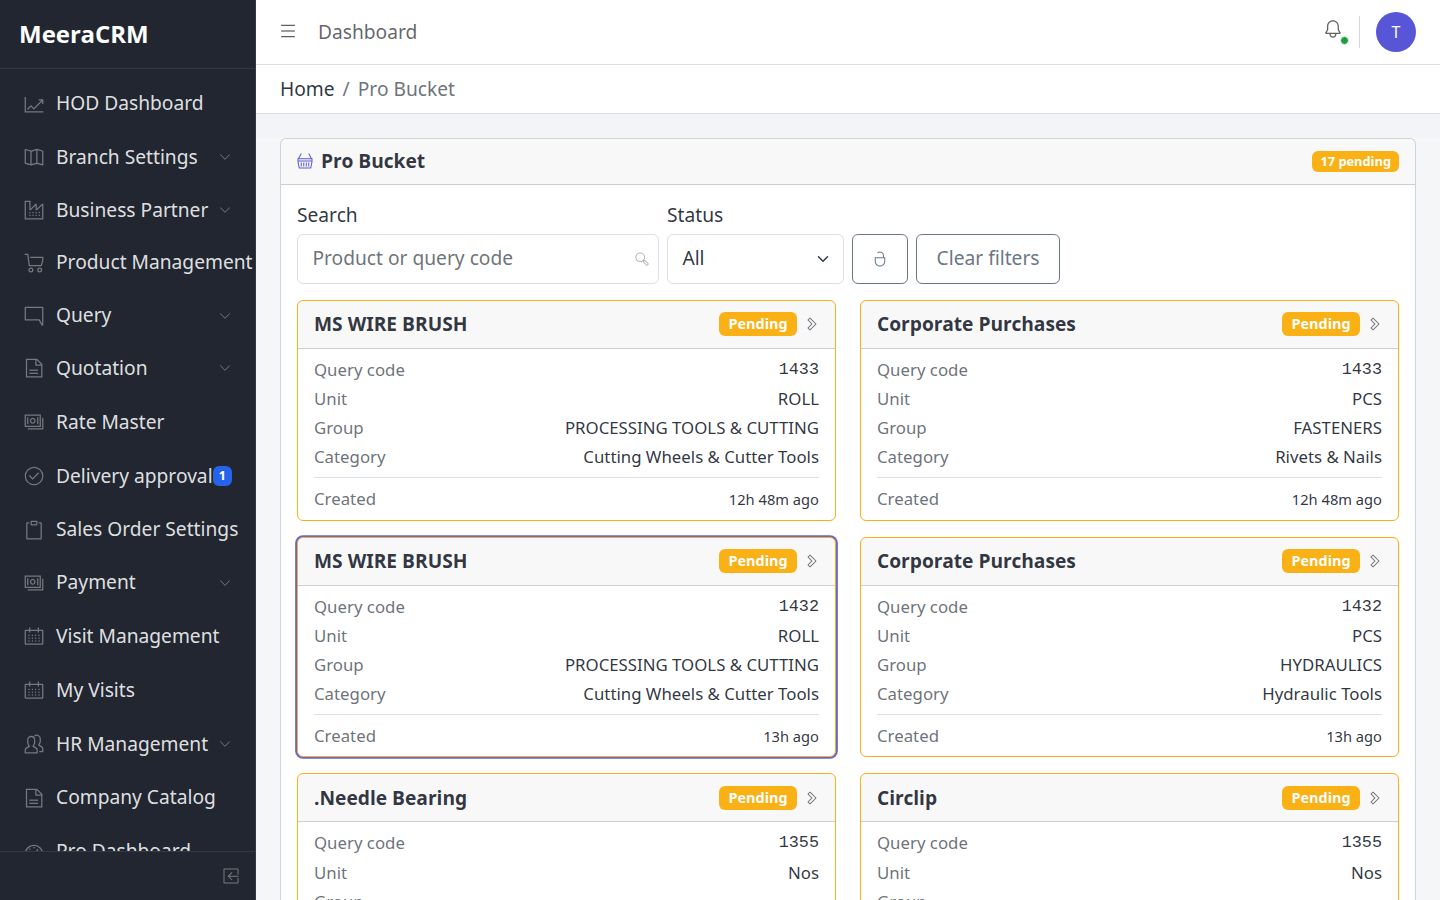
Procurement Steps (Query Production)
- Pro Dashboard या Pro Bucket (sidebar badge = pending count)
- Pending card click → product detail
- Add Rate – Supplier + Rate + Unit + Remark
- 3 rates = Fulfilled; 1-2 = Rate Submitted
HOD Steps
- Pro Bucket में line open → submitted rates review
- Best rate Approve → Quotation में Import Pro Rates
✅ Pro Bucket Rate Validation proBucket.validator.js
| Rate * | Number ≥ 0, required |
|---|---|
| Supplier | Valid supplier select — pehle supplier master mein hona chahiye |
| Min rates array | At least 1 rate entry per submit |
| Status logic | 0 rates = Pending · 1–2 = Rate Submitted · 3+ = Fulfilled |
| HOD approve | minRate / maxRate ≥ 0 required for rate card approval |
🎯 Procurement – Screen par kya karein
- Pro Bucket filter: Status = Pending ya All
- Search: product name ya query code se filter
- Card click → detail page → har supplier ka rate alag submit
- Target: 3 alag suppliers se rates — phir HOD ko approve ke liye bhejein
⚠️ ध्यान रखें
- Bina product code (
rawProductCode) wali line par procurement rates unavailable - HOD approve ke bina quotation mein pro rate import nahi hoga
- Sidebar badge number = pending Pro Bucket count — daily check karein
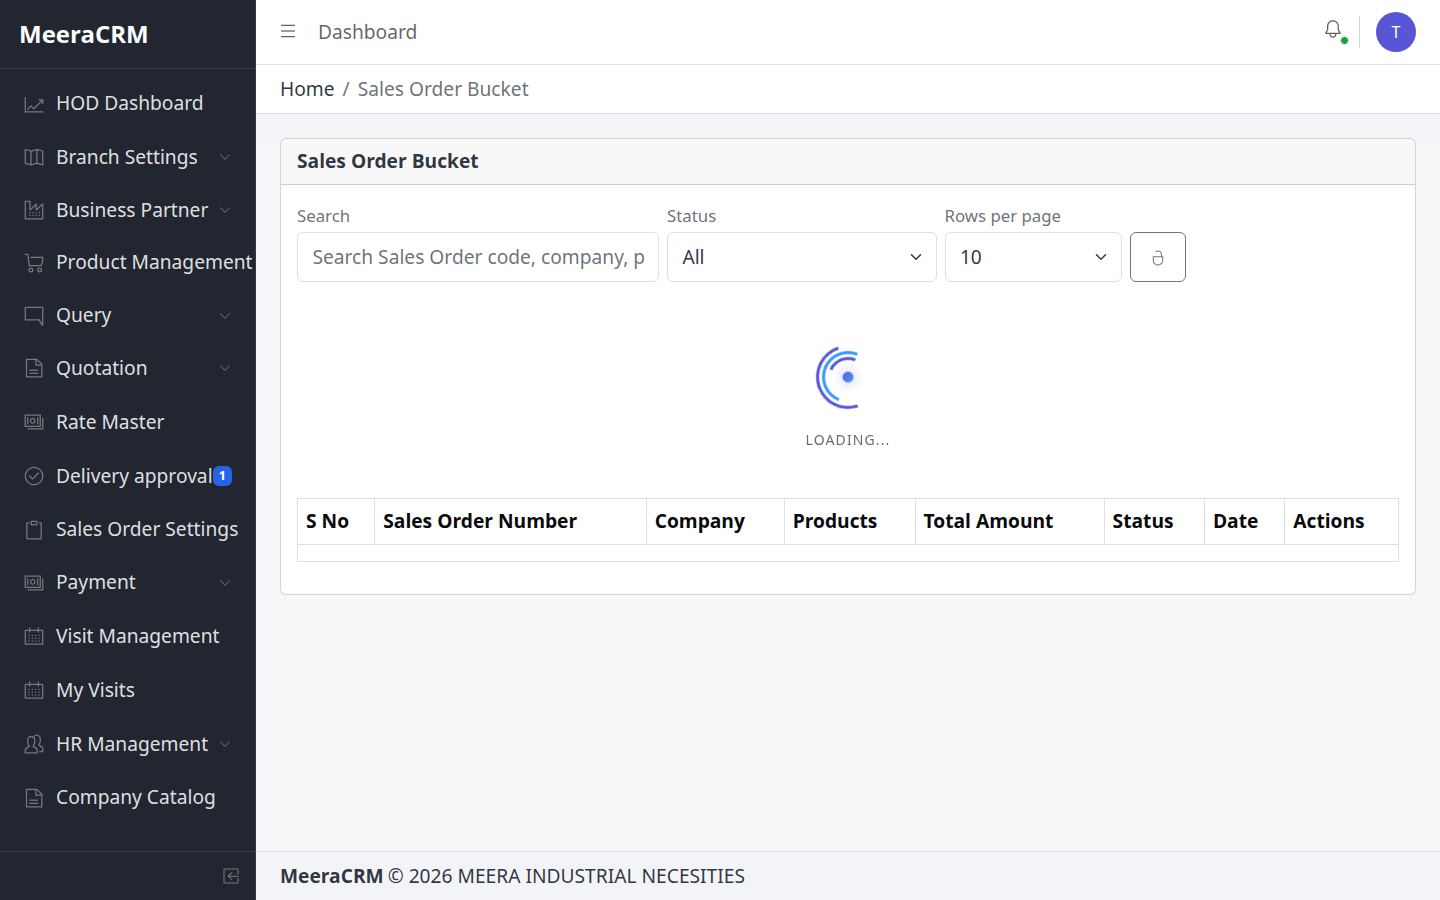
⑨ कोटेशन → PO (HOD Approval)
Sales creates → HOD approves → PO convert
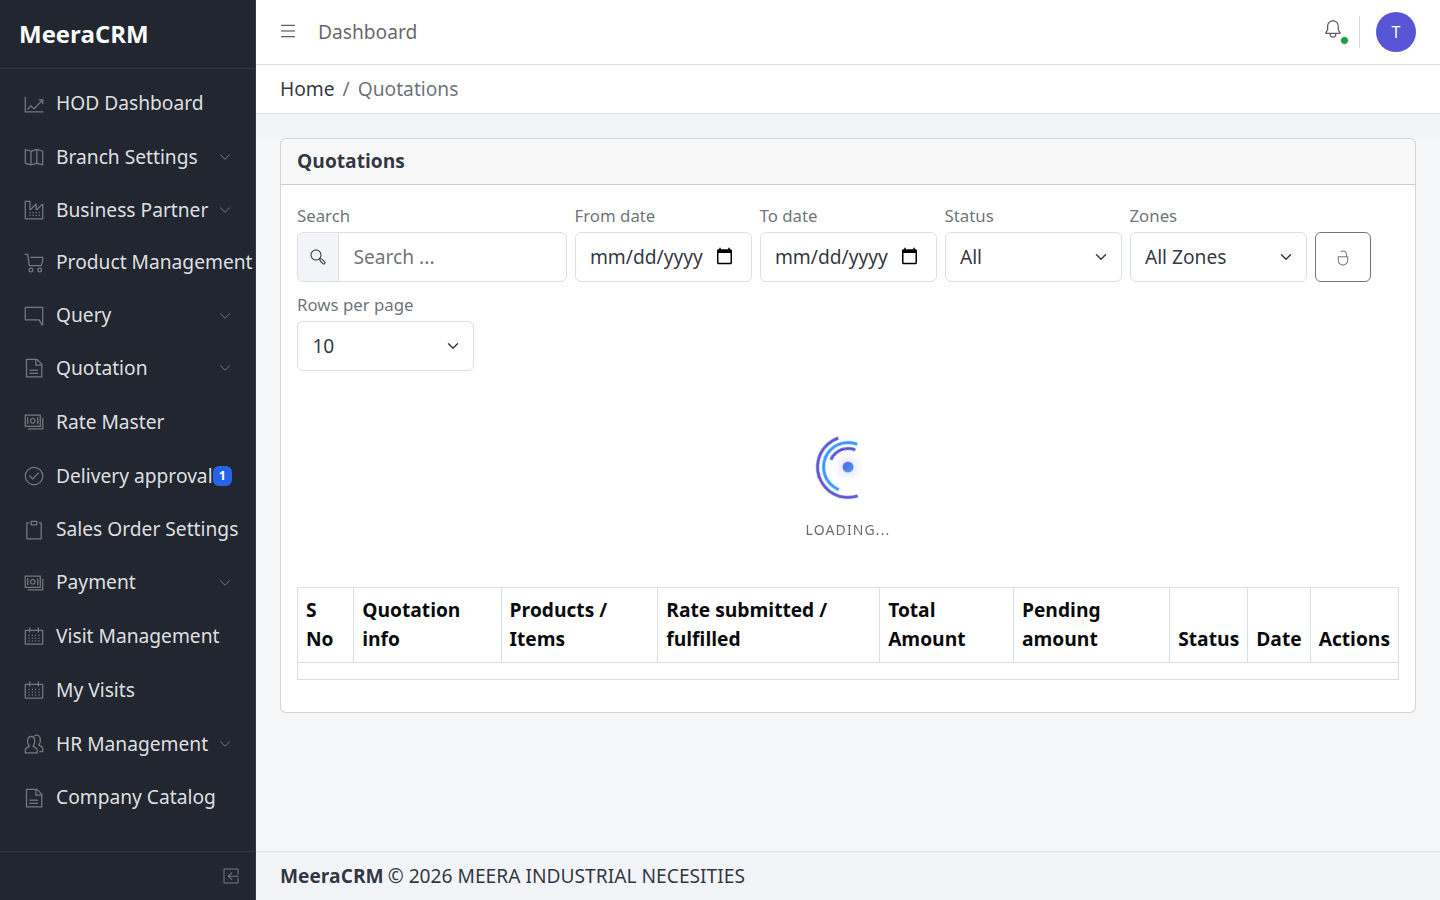
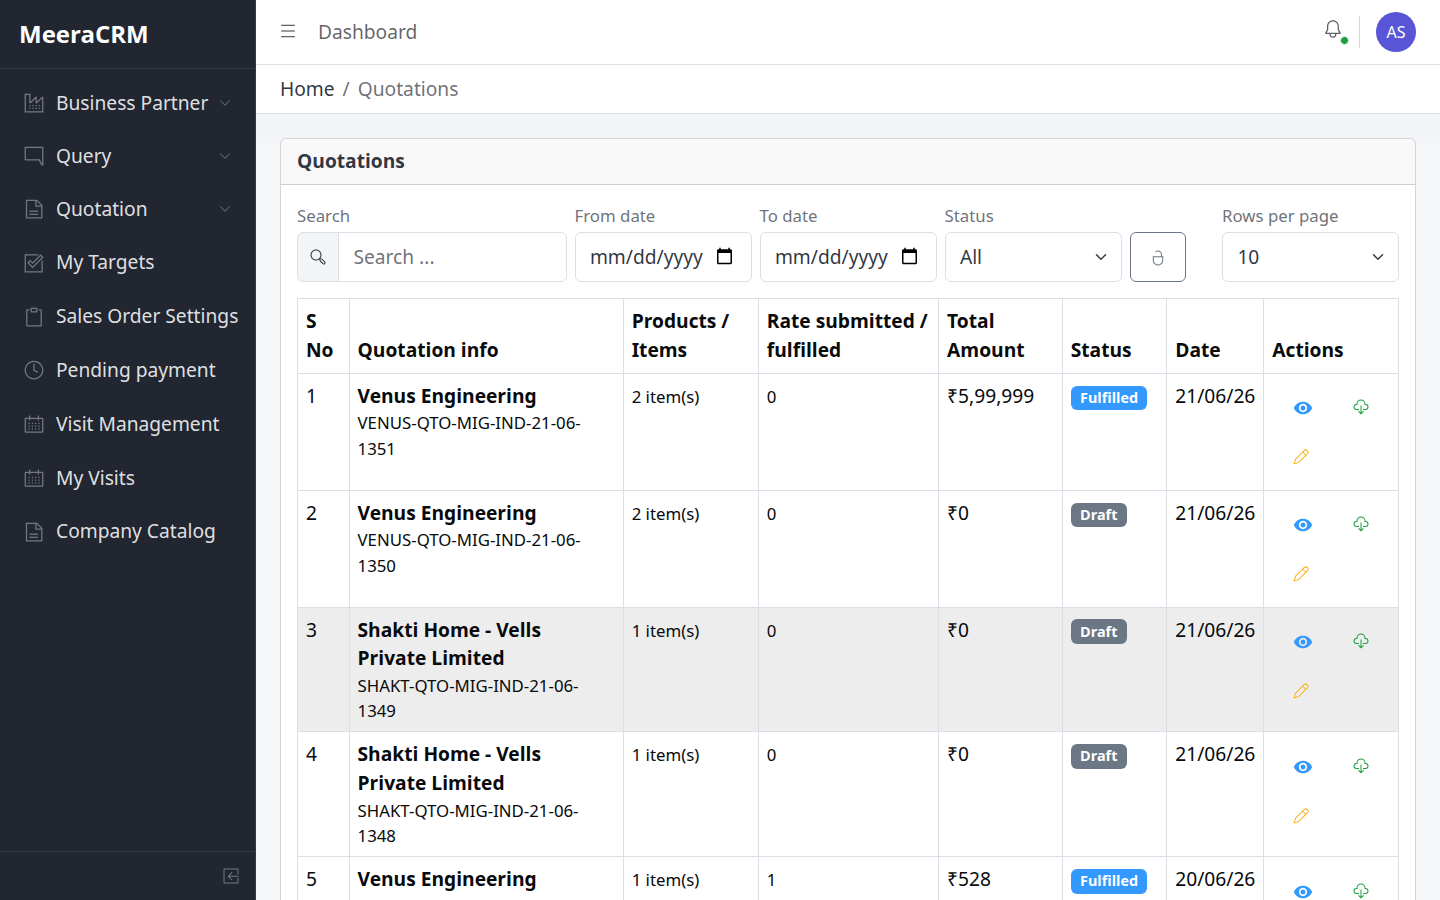
Quotation Flow
- Query → Convert to Quotation या Quotations → Create
- Import Pro Rates → Sale rate set → Mark Ready
- HOD → HOD Approve → PDF → Send to Client
PO Steps
- HOD Approved Quotation → Convert to Purchase Order
- HOD → PO Approve (Sales Order Bucket)
- Lines → Purchase Bucket (Procurement PO Production)
✅ Quotation Validation QuotationView.js + quotation.validator.js
| Product lines | productName + quantity (integer ≥ 0) required per line |
|---|---|
| GST % | 0–100 required jab rate set ho |
| rawProductCode | Procurement rates ke liye product code zaroori |
| Sale rate | Har line par client price set — Ready mark karne se pehle |
| HOD approve | Status ready se hod_approved — PO convert gate |
| Freight | Valid number hona chahiye agar add kiya ho |
✅ PO Validation purchaseOrder.service.js
| Quotation status | hod_approved required — warna PO create fail |
|---|---|
| PO code | Auto-generate company name se |
| Priority | high / medium / low per line |
| PO lines | Auto-create in Purchase Bucket as po_products |
⚠️ ध्यान रखें
- Quotation bina HOD approve ke client ko final mat bhejein agar PO expected hai
- Import Pro Rates tabhi kaam karega jab HOD ne Pro Bucket rates approve kiye hon
- PO HOD approve ke bina Purchase Bucket mein procurement start nahi hota
- Client se PO milne par quotation status
poReceivedupdate karein
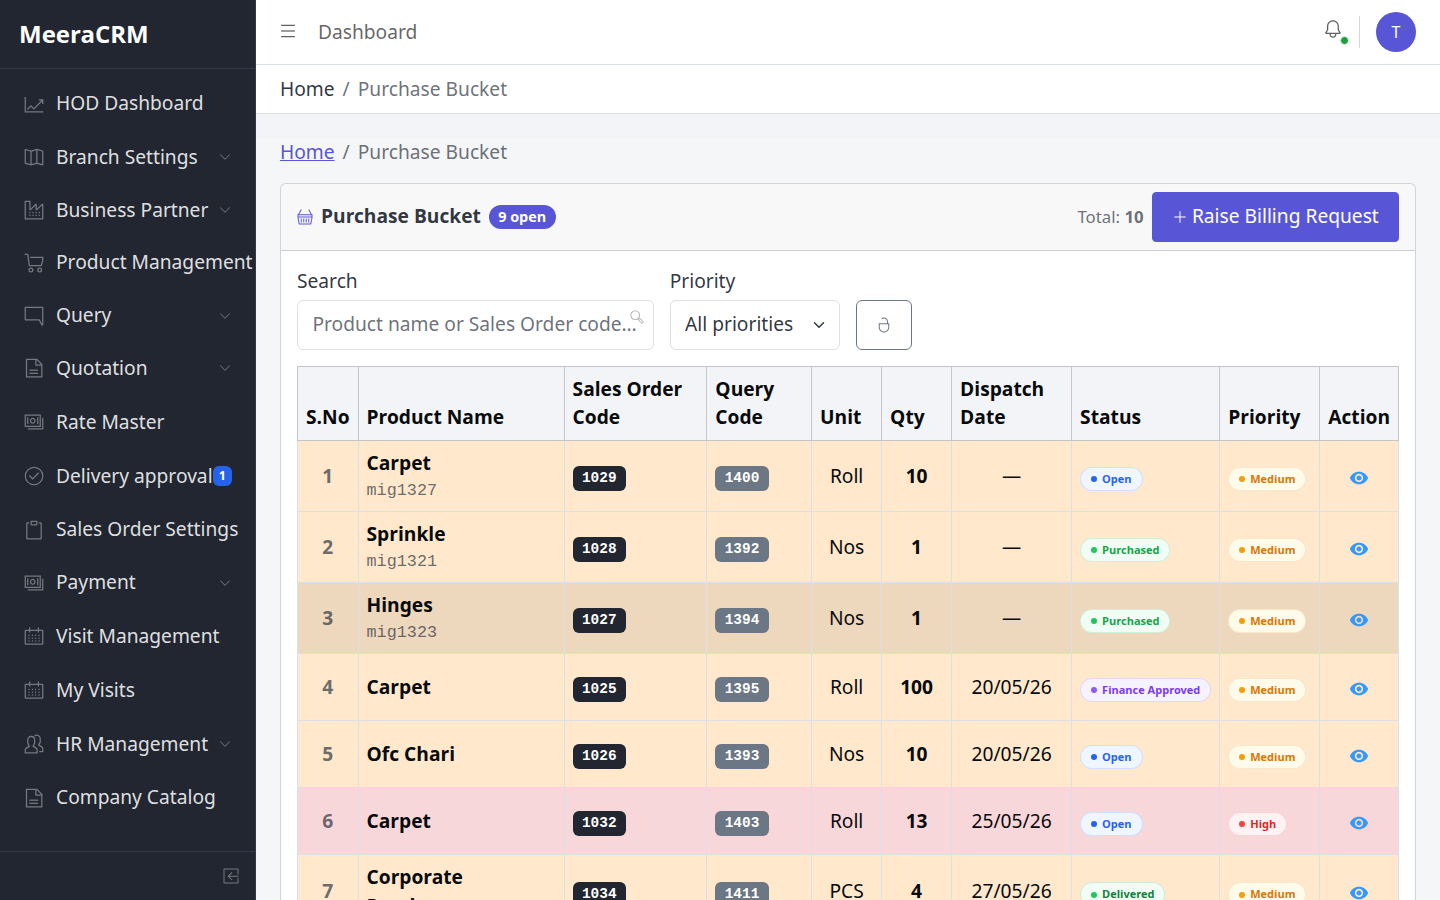
⑩ Inventory / Dispatch / Delivery Approval
HOD sidebar: Delivery approval (pending badge)

Full PO Line Flow
🎯 Role-wise Actions
| Inventory Manager | Purchase Bucket se stock receive → status inventory_received |
|---|---|
| Dispatch Manager | ready_for_dispatchment → dispatch → delivery proof upload → delivered |
| HOD | Delivery approval menu → proof verify → Approve (sidebar badge check karein) |
| Finance | Batch Billing / Billing Requests se client invoice |
✅ PO Line Status poProduct.model.js
- Valid statuses:
pending → purchased → inventory_received → ready_for_dispatchment → delivered → finance_approved → po_closed - Delivery ke baad HOD gate:
deliverySubStatus = hod_approval_pending - Payment request: supplier bill document upload required
⚠️ ध्यान रखें
- Delivery proof (receiving document) bina approve mat karein
- Skip steps nahi kar sakte — har role apna status update kare
- HOD approval ke baad line finalize — dubara edit mushkil
⑪ Sales Manager – पूरी प्रक्रिया
sales@gmail.com / 123123

Sales के मुख्य काम
- Query create (client + products + codify)
- Quotation – pro rates import, sale rate, send client
- Client PO मिलने पर PO Received update
- PO convert (HOD approval के बाद)
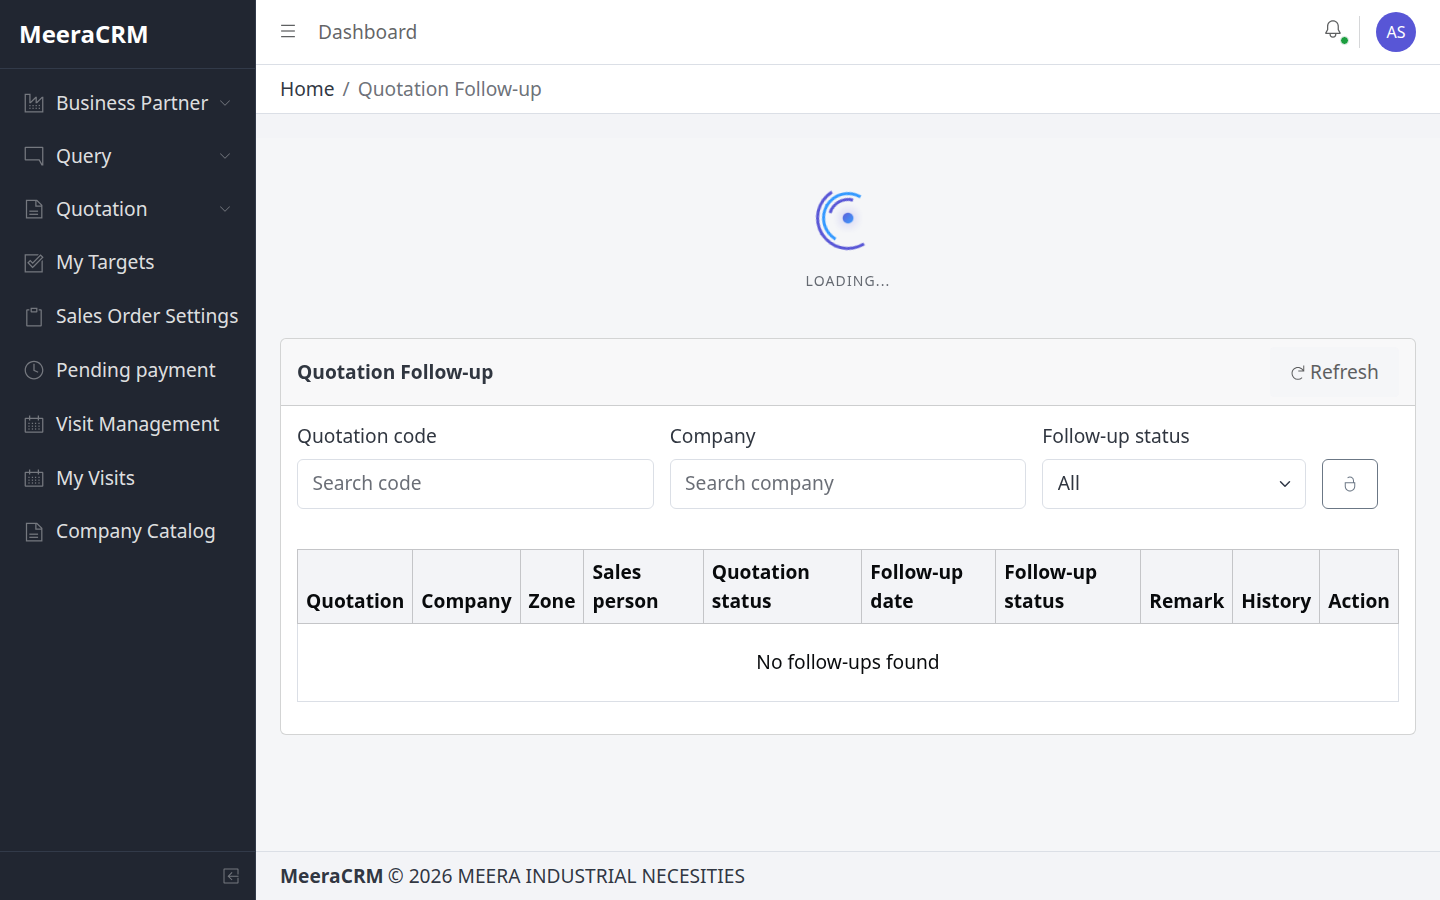
- Quotation Follow-up dashboard monitor
🎯 Sales – Screen-by-screen
- Queries → Add: client search, purchase manager, products — validation pass karke save
- Quotations: query se convert → Import Pro Rates → har line GST + sale rate
- Mark Ready → HOD ko approve ke liye chhod dein
- Quotation Follow-up: client response track — followup01/02 statuses
- HOD approve ke baad PO convert
✅ Sales Validation Highlights
- Query: same rules as QueryForm — company, purchase manager, reference by, min 1 product
- Quotation line: GST 0–100 mandatory jab rate set ho
- New product in quotation: Group + Category + min 1 image required
- Freight amount valid number hona chahiye
⚠️ ध्यान रखें
- Pro rates import tabhi — jab procurement + HOD approve ho chuke hon
- Sale rate procurement cost se kam set mat karein bina HOD knowledge
- Converted query edit nahi kar sakte (sirf HOD draft edit)
⑫ Back Office Exicutive – प्रक्रिया
be@gmail.com / 123123
Back Office Steps
- Sales/HOD से requirement लेकर Query form fill
- Client search / Create client
- Products add – catalog या new product codify
- Query Products list में line status track
🎯 Back Office – Daily Actions
- Sales se written requirement lo — phone/WhatsApp details Query form mein daalo
- Client search mein pehle existing industry check karo — duplicate client mat banao
- Naye product par Group/Category zaroor select karo (new query rule)
- Query Products list se track karo kaunsi line Pro Bucket mein pending hai
✅ BO ke liye Critical Validations
- Purchase manager phone: exactly 10 digits agar diya ho
- Product quantity: whole number, max 1,00,000
- Codify: Group + Category missing par "Group is required" / "Category is required" error
- Query reference by empty chhodne par next step block
⚠️ ध्यान रखें
- Galat client select karne par poori quotation galat company par chali jayegi
- BO ko quotation approve/send ki permission nahi hoti — sirf data entry
- Save ke baad procurement ko inform karein — Pro Bucket pending dikhega
⑬ Procurement – Query + PO Production
pro@gmail.com / 123123


Procurement – दो मुख्य phases
- Query Production (Pro Bucket): supplier rates submit (min 3 = fulfilled) → HOD approve
- PO Production (Purchase Bucket): HOD approved PO lines → purchase → bill upload → payment request → Finance
- Procurement Bucket / Follow-up Bucket – pending tasks track
🎯 Phase 1 – Query Production (Pro Bucket)
- Pro Dashboard se pending count dekho
- Pro Bucket → pending card → detail open
- Har supplier ka rate alag submit — rate ≥ 0
- 3 rates complete → HOD approve wait
🎯 Phase 2 – PO Production (Purchase Bucket)
- HOD approved PO lines Purchase Bucket mein dikhengi
- Target rate negotiate → Mark as Purchased
- Supplier bill upload → Payment Request raise
- Finance approve ke baad inventory handoff
✅ Procurement Validations
| Pro rate | Rate number ≥ 0; kam se kam 1 rate per submit |
|---|---|
| Supplier | Master mein registered supplier hona chahiye |
| Payment request | Bill document upload; amount ≥ 0 |
| PO line | Tabhi open jab PO HOD approved ho |
⚠️ ध्यान रखें
- Supplier pehle create karein — Pro Bucket mein bina supplier ke rate nahi
- Same supplier se 3 duplicate rates fulfill count badha dete hain — alag suppliers prefer karein
- Purchase Bucket aur Follow-up Bucket daily check — sidebar badge numbers dekhein
- Payment request bina bill upload ke Finance reject kar sakta hai
⑭ रोल-वाइज Quick Reference
🏢 HOD
- Employees
- Pro/QT/PO approve
- Delivery approval
📞 Sales
- Query + Quotation
- Client follow-up
- PO convert
📋 Back Office
- Query entry
- Codify help
- Query Products
🛒 Procurement
- Pro Bucket rates
- Purchase Bucket
- Suppliers
node capture-real-screenshots.mjs (https://crm.n.migti.com/ accessible हो)⑯ Flowchart – सभी रोल्स (Role-wise)
नीचे किसी भी role par click karein — us role ki poori responsibilities ka visual flowchart dikhega. Labels Hindi + English mix mein hain.
End-to-End CRM Flow (सभी roles का overview)
flowchart LR
  Q[Query Create
Sales / BO / HOD] --> PB[Pro Bucket
Procurement rates]
  PB --> HA{HOD Rate
Approve?}
  HA -->|Yes| QT[Quotation
Sales]
  QT --> HQ{HOD QT
Approve?}
  HQ -->|Yes| PO[PO Convert
Sales]
  PO --> HP{HOD PO
Approve?}
  HP -->|Yes| PUR[Purchase Bucket
Procurement buy]
  PUR --> FIN[Finance
Payment + Billing]
  PUR --> INV[Inventory
Stock receive]
  INV --> DIS[Dispatch
Delivery proof]
  DIS --> HD{HOD Delivery
Approve?}
  HD -->|Yes| DONE[PO Closed]
Flowchart – HOD (Head Of Department)
HOD Setup + monitoring + 4 approval gates
flowchart TD
  A([Login
Head Of Department]) --> B[HOD Dashboard
Pending badges dekhein]
  B --> C[Employees
User + Role + Permissions + Zones]
  C --> D[Supplier oversight
Business Partner → Suppliers]
  D --> E[Query flow monitor
Sales/BO se queries]
  E --> F{Pro Bucket
Rates approve?}
  F -->|3 rates + margin OK| G{Quotation
HOD approve?}
  G -->|Sale rate + GST OK| H{PO Bucket
PO approve?}
  H -->|PO valid| I[Purchase Bucket open
Procurement buying start]
  I --> J[Delivery Approval
Dispatch proof verify]
  J --> K{Proof sahi hai?}
  K -->|Approve| L([Done
Line finalize / po_closed])
  K -->|Reject| M[Dispatch ko
correction bhejein]
  M --> J
Key Responsibilities
- Employees create — branch create nahi
- Pro Bucket rate approve (min procurement cost set)
- Quotation HOD approve (margin check)
- PO HOD approve → Purchase Bucket
- Final delivery approval after dispatch proof
Flowchart – Sales Manager
Sales Manager Client-facing flow — Query se PO tak
flowchart TD
  A([Login
Sales Manager]) --> B[Dashboard
Open queries / quotations]
  B --> C[Query → Add
Client + Products + Codify]
  C --> D[Save Query
Lines → Pro Bucket]
  D --> E[Wait
Procurement rates + HOD approve]
  E --> F[Quotation create
Query se convert]
  F --> G[Import Pro Rates
GST + Sale rate set]
  G --> H[Mark Ready
HOD approval ke liye]
  H --> I{HOD approved?}
  I -->|No| H
  I -->|Yes| J[Client ko quotation bhejein
Quotation Follow-up]
  J --> K[Client PO mila?
Status: poReceived]
  K -->|Yes| L[PO Convert
HOD PO approve wait]
  L --> M([Done
Purchase Bucket mein jayega])
  K -->|No| J
Key Responsibilities
- Query create / client requirement capture
- Quotation pricing + client send
- Follow-up dashboard monitor
- PO received update + PO convert (post HOD QT approve)
Flowchart – Back Office Exicutive
Back Office Data entry + codification support
flowchart TD
  A([Login
Back Office Exicutive]) --> B[Dashboard]
  B --> C[Sales/HOD se requirement lo
Phone / WhatsApp details]
  C --> D[Query → Add
Step 1: Company Info]
  D --> E{Client exists?}
  E -->|Search match| F[Client select
Zone auto-fill]
  E -->|Naya client| G[Create client
Industry + zone set]
  F --> H[Step 2: Products]
  G --> H
  H --> I{Product catalog mein?}
  I -->|Yes| J[Catalog se add]
  I -->|Naya| K[Codify
Group + Category → mig####]
  J --> L[Step 3: Preview → Save]
  K --> L
  L --> M[Query Products list
Line status track]
  M --> N[Procurement ko inform
Pro Bucket pending]
  N --> O([Done
Sales quotation banayega])
Key Responsibilities
- Accurate query data entry — galat client = galat PO
- Codify support (Group/Category mandatory for new products)
- Query Products tracking — BO approve/send nahi karta
Flowchart – Procurement
Procurement Query Production + PO Production
flowchart TD
  A([Login
Procurement]) --> B[Pro Dashboard
Pending count]
  B --> C[Supplier create
Business Partner]
  C --> D[Pro Bucket
Pending card open]
  D --> E[Har supplier ka rate submit
Rate ≥ 0]
  E --> F{3 rates complete?}
  F -->|No| E
  F -->|Yes| G[HOD rate approve wait]
  G --> H{PO HOD approved?}
  H -->|Yes| I[Purchase Bucket
PO Production lines]
  I --> J[Negotiate + Mark Purchased]
  J --> K[Supplier bill upload]
  K --> L[Payment Request raise
Finance ke paas]
  L --> M[Follow-up Bucket
Pending tasks daily check]
  M --> N([Done
Inventory receive])
  H -->|No| M
Key Responsibilities
- Phase 1: Pro Bucket rates (min 3 suppliers)
- Phase 2: Purchase Bucket buying after HOD PO approve
- Bill upload + payment request — bina bill ke Finance reject
- Follow-up Bucket daily monitor
Flowchart – Finance
Finance — supplier payment + client billing
flowchart TD
  A([Login
Finance]) --> B[Payment Requests
Procurement se aaye]
  B --> C{Bill document
uploaded hai?}
  C -->|No| D[Reject / return
Procurement ko inform]
  D --> B
  C -->|Yes| E[Amount verify
PO line match]
  E --> F{Approve payment?}
  F -->|Approve| G[Supplier payment process]
  G --> H[Batch Billing / Billing Requests]
  H --> I[Client invoice generate
Delivered lines par]
  I --> J[PO line status
finance_approved]
  J --> K([Done
Accounts closed])
  F -->|Reject| D
Key Responsibilities
- Procurement payment requests review + approve
- Bill document mandatory check
- Client-side billing / invoice after delivery flow
- PO line ko finance_approved status dena
Flowchart – Inventory Manager
Inventory — stock receive after procurement purchase
flowchart TD
  A([Login
Inventory Manager]) --> B[Inventory Bucket
Pending receives]
  B --> C[Purchase Bucket se line
Status: purchased]
  C --> D[Physical stock verify
Qty + item match]
  D --> E{Stock OK?}
  E -->|Mismatch| F[Procurement / HOD
correction raise]
  F --> C
  E -->|OK| G[Mark Inventory Received
status: inventory_received]
  G --> H[Ready for dispatch queue
Dispatch team ko handoff]
  H --> I([Done
Dispatch Manager next step])
Key Responsibilities
- Purchased lines ko physically receive karna
- Status update: inventory_received
- Qty mismatch par turant escalate — skip mat karein
Flowchart – Dispatch Manager
Dispatch — delivery to client + proof upload
flowchart TD
  A([Login
Dispatch Manager]) --> B[Dispatchment menu
ready_for_dispatchment lines]
  B --> C[Dispatch plan
Client address verify]
  C --> D[Goods dispatch karein
Transporter / LR details]
  D --> E[Delivery proof upload
Receiving document / photo]
  E --> F[Mark Delivered
status: delivered]
  F --> G[HOD Delivery Approval
pending queue]
  G --> H([Done
HOD final approve karega])
Key Responsibilities
- ready_for_dispatchment lines process karna
- Delivery proof upload — bina proof HOD approve nahi
- Status: delivered set karna
Flowchart – Local Purchase
Local Purchase — urgent / local market buying
flowchart TD
  A([Login
Local Purchase]) --> B[Local purchase tasks
Urgent requirements]
  B --> C[Requirement verify
Sales / HOD se confirm]
  C --> D[Local vendor se buy
Bill / receipt collect]
  D --> E[Purchase entry CRM mein
Amount + vendor details]
  E --> F[Bill upload
Payment request]
  F --> G[Finance approval wait]
  G --> H{Approved?}
  H -->|Yes| I[Inventory receive
ya direct dispatch]
  H -->|No| J[Correction + re-submit]
  J --> F
  I --> K([Done
Normal PO flow join])
Key Responsibilities
- Local / urgent items khareedna
- Bill + vendor proof CRM mein upload
- Finance payment request follow-up
Flowchart – Local Procurement
Local Procurement — local suppliers + local PO buying
flowchart TD
  A([Login
Local Procurement]) --> B[Local Pro Bucket tasks
Regional suppliers]
  B --> C[Local supplier rates submit
Same as Pro Bucket rules]
  C --> D{Min rates complete?}
  D -->|No| C
  D -->|Yes| E[HOD approve wait]
  E --> F[Local PO lines
Purchase Bucket subset]
  F --> G[Local vendor purchase
Bill collect]
  G --> H[Payment request
Finance]
  H --> I[Follow-up Bucket
Daily pending check]
  I --> J([Done
Inventory / Dispatch flow])
Key Responsibilities
- Local supplier rates (Pro Bucket jaisa process)
- Local PO buying + bill upload
- HOD + Finance approvals ka wait — skip nahi
⑮ Practice – Dev Server पर अभ्यास
सीखने और trial के लिए सिर्फ Dev URL use करें — Real server par practice mana hai.
अगर आपको कोई भी Practice / अभ्यास / Trial करना है, तो सिर्फ नीचे दिए गए Dev URL पर जाकर practice करें:
https://dev.crm.i.migti.com/
Real URL (https://crm.n.migti.com/) पर कोई भी practice नहीं करनी है — वह हमेशा Real Production Server रहेगा। Real server में जो भी data डालें, वह 100% सही और verified होना चाहिए — गलत / test / dummy data bilkul mat daalein।
Dev Server – Login IDs & Passwords
Login page par email + password bharein aur Role dropdown se sahi role select karein.
| # | Email (User ID) | Password | Login में Role select करें |
|---|---|---|---|
| 1 | sales1@migti.com | sales1@123 | Sales Manager |
| 2 | sales2@migti.com | sales2@123 | Sales Manager |
| 3 | backoffice1@migti.com | backoffice1@123 | Back Office Exicutive |
| 4 | backoffice2@migti.com | backoffice2@123 | Back Office Exicutive |
| 5 | finance1@gmail.com | finance1@123 | Finance |
| 6 | inventry1@gmail.com | inventry1@123 | Inventry Manager |
| 7 | dispatch1@gmail.com | dispatch1@123 | Dispatch Manager |
| 8 | localpurchase1@gmail.com | localpurchase1@123 | Local Purchase |
| 9 | localprocurment1@gmail.com | localprocurment1@123 | Local Procurement |
| 10 | procurment1@gmail.com | procurment1@123 | Procurement |
🎯 Practice कैसे करें (Dev Server)
- https://dev.crm.i.migti.com/#/login खोलें
- ऊपर table से अपne role का Email + Password enter करें
- Select Role dropdown — table में दिया गया role choose करें
- Sign In → इस guide के steps follow karke process practice karein
- Query, Supplier, Pro Bucket, Quotation — sab yahan try karein
⚠️ Dev vs Real — Rules
| Dev Server | dev.crm.i.migti.com — Practice, learning, trial OK |
|---|---|
| Real Server | crm.n.migti.com — Sirf real work; sahi client, sahi rates, sahi data |
| Galat role | Dono servers par "Email not found" error — role exact match hona chahiye |
| Password share | Credentials team ke andar hi rakhein — public mat karein |